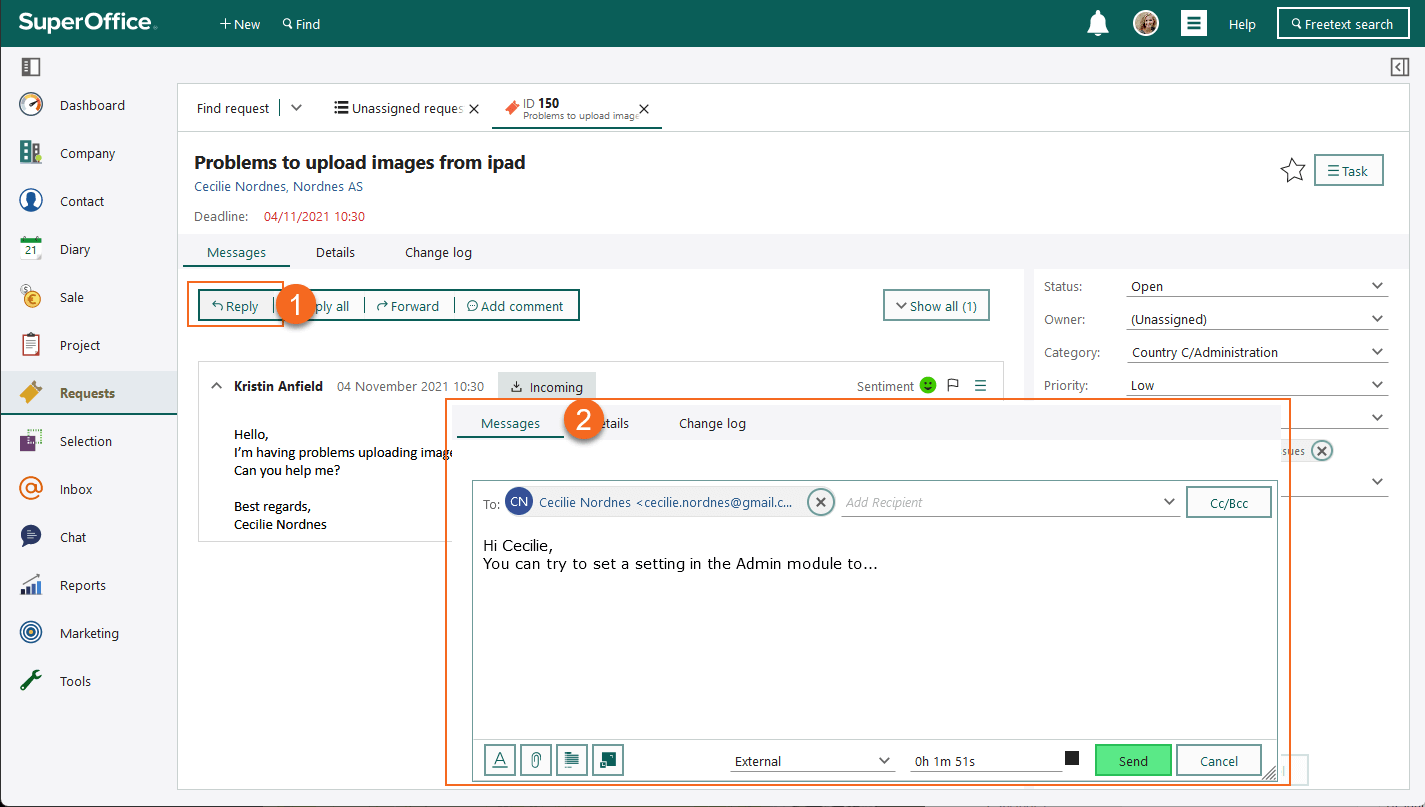
Reply to contact
In request handling, your most important task is to respond to inquiries. Replies can be sent to a single request or multiple requests at once.
When you open a request and select Reply, the email signature you have set up will automatically appear and you can to add your message to the contact containing the answer to their question or the solution to their problem.
Tip
Set the No. of expanded messages preference (under Personal settings > Preferences > Request) to control how many messages are shown when viewing a request.
Reply to a request
Click or .
- Alternatively, click and select Reply or Reply all.
The contact is automatically added as a recipient in the To field. You can add or remove recipients as needed.
Type your message in the Message tab.
- Use reply templates to save time. If the template is available in multiple languages, you can select a language ().
- Ensure External is selected in the Access level field if the contact should see the message.
Click to attach relevant documents.
Click Save to send the message.
- If the Anonymise users on reply global preference is enabled, your name will be removed from outbound messages.
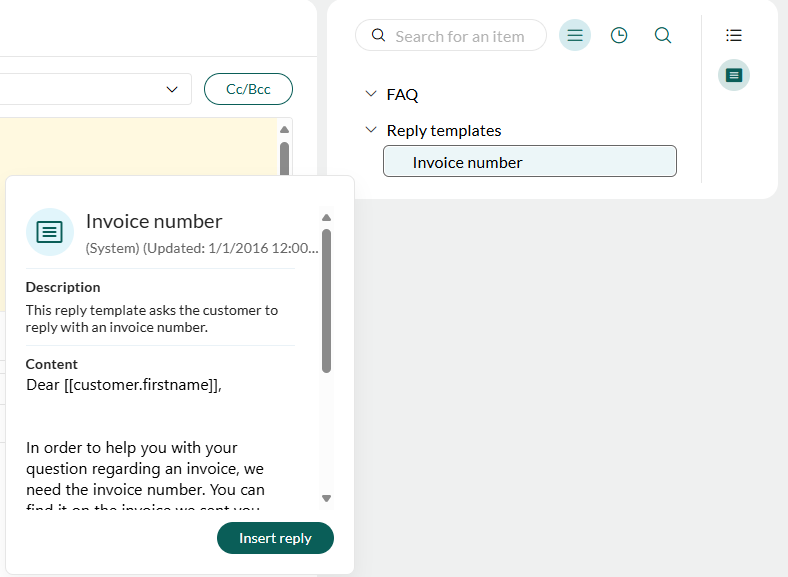
Insert reply templates
You can save time by using reply templates as a starting point for your reply.
- Place the cursor in the message field where you want to insert the template.
- In the Properties panel, click and select Reply template.
- Choose a template from the list. Hover over it to preview before inserting.
- Edit the text as needed and attach files if required.
Add FAQ entries
When you respond to a customer enquiry, you can save time by inserting a link to an FAQ entry in your reply.
Go to the Message tab.
Position the mouse pointer in the message where you want to insert the link.
In the Properties panel, click and select what to insert in the message.
Tip
In the Add text pop out, you can preview any of the FAQ items by moving your cursor over the different entries.
Click on the wanted FAQ entry.
A link is inserted at your cursor position. The customer can click it to show the relevant FAQ entry in the customer centre.
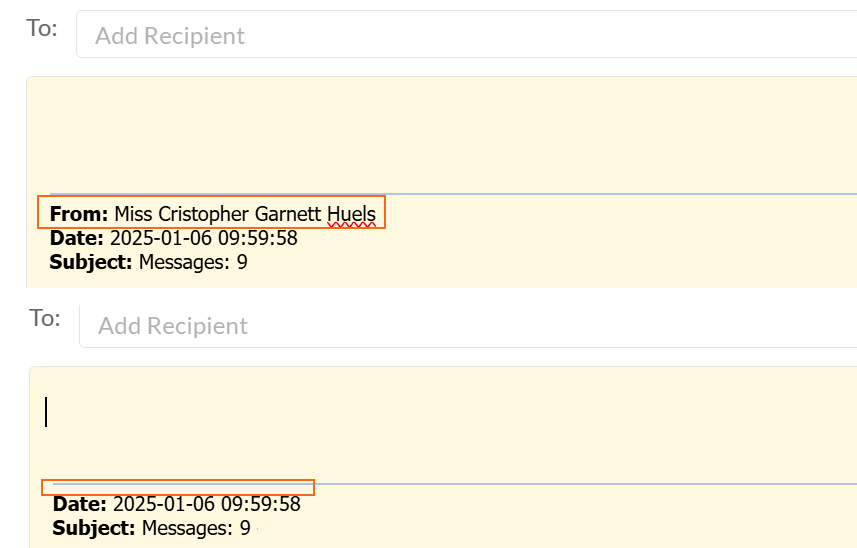
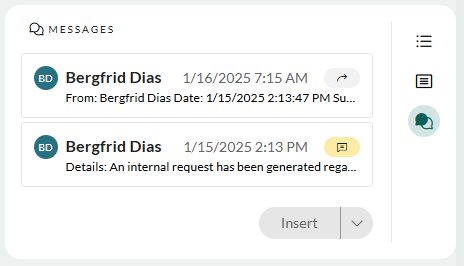
Insert earlier message
You can insert an earlier message into your current reply.
Open the request and place the cursor where you want to insert the message content.
In the right-side Properties panel, click .
Select a message from the list.
Click Insert to insert the message including attachments.
- Alternatively, click the chevron next to Insert to choose one of the following:
- Insert with attachments: Inserts the message content and any attached files.
- Insert without attachments: Inserts only the message content.
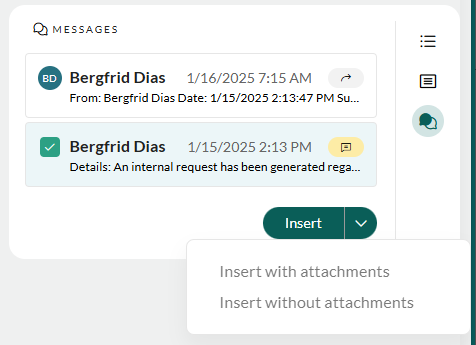
- Alternatively, click the chevron next to Insert to choose one of the following:
Edit the text as needed.
Add a message to multiple requests
You can reply to several requests simultaneously, for example, if multiple inquiries relate to the same issue.
Select the requests you want to reply to:
- Use a saved selection in the Selection screen.
- Use the Find requests screen results.
Click the Task button and choose Reply to customers.
In the Reply to customers dialog:
- Send copy to customers (only external requests): Check this box to send the message via email.
- Close request: Check this box to close the requests after sending the message.
- Add your message in the text area. Use reply templates to save time.
The message you enter will be added to the selected requests and sent by email to the contacts linked to the selected external requests.
Click Reply to send the message.
Add a comment
Comments allow you to add internal notes to a request without sending them to the customer. For example, to include what you have done or discovered so far.
- Open the request.
- Click above the message thread.
- Add your comment in the text field.
- Select Internal in the toolbar to ensure the comment is visible only to your colleagues.
- Click Save.
Tip
Use comments to provide context when transferring requests to colleagues.
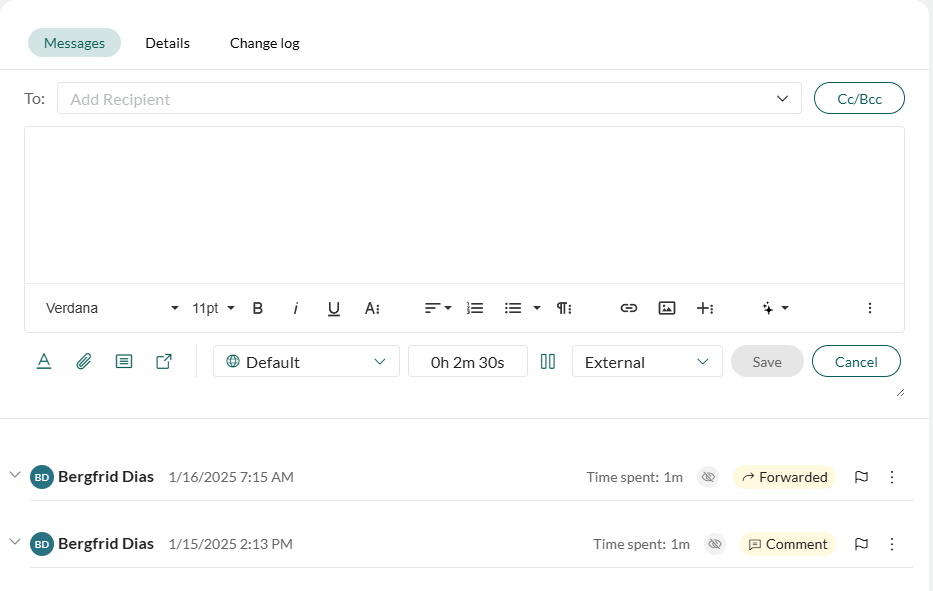
Keep track of time
When you reply to a request, you can track the time spent on the response.
- In the toolbar at the bottom of the Message tab, check the timer:
- Click to start tracking time.
- Click to stop the timer.
- Edit the time manually if needed.
- Save the request to log the time spent.
Time spent is displayed in each message header, and the time to reply is available in the Change log tab.