Create a new contact
You can add a contact to SuperOffice CRM in multiple ways:
- From the top bar or Company screen (steps below).
- Scan a business card using the SuperOffice Mobile CRM app.
- Bulk import contacts (requires Administrator rights).
Steps
Open the Contact screen:
- Click New on the top bar and select Contact.
- Or, go to the required company in the Company screen, select the Contacts section tab, and click the Add button.
Provide essential contact details:
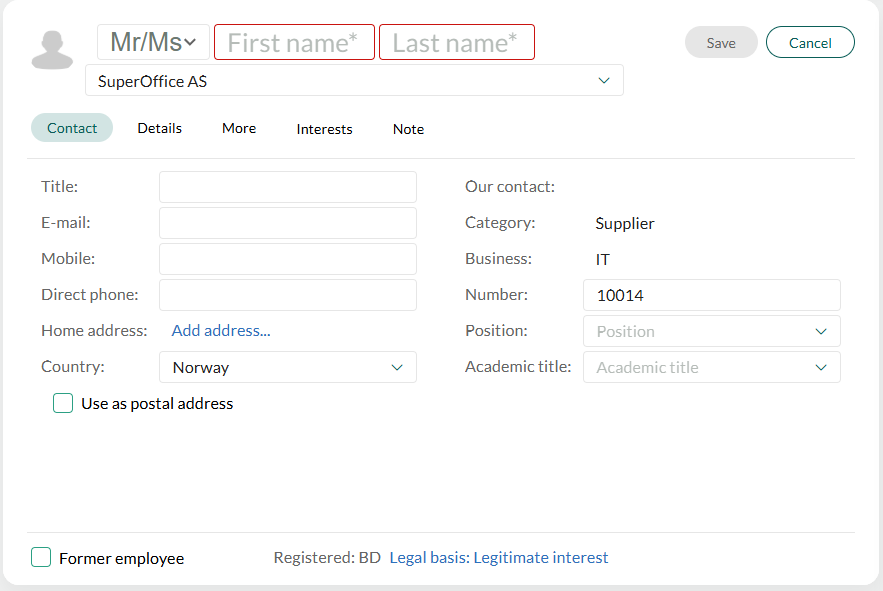
- Enter the First name and/or Last name (mandatory: at least one must be filled in)
- Optional: Choose salutation (Mr/Ms)
- Select the Company:
- Start typing to search for a company or select (No Selection) if the contact is not linked to a company.
- Optional: Add a Contact image by dragging an image file onto the image field or right-clicking to upload.

Fill in the Contact tab fields.
- Fill in the Country field. This updates the address format for that country automatically. The default country is the country recorded for the company.
- Complete any additional fields as required, such as Mobile, and Email.
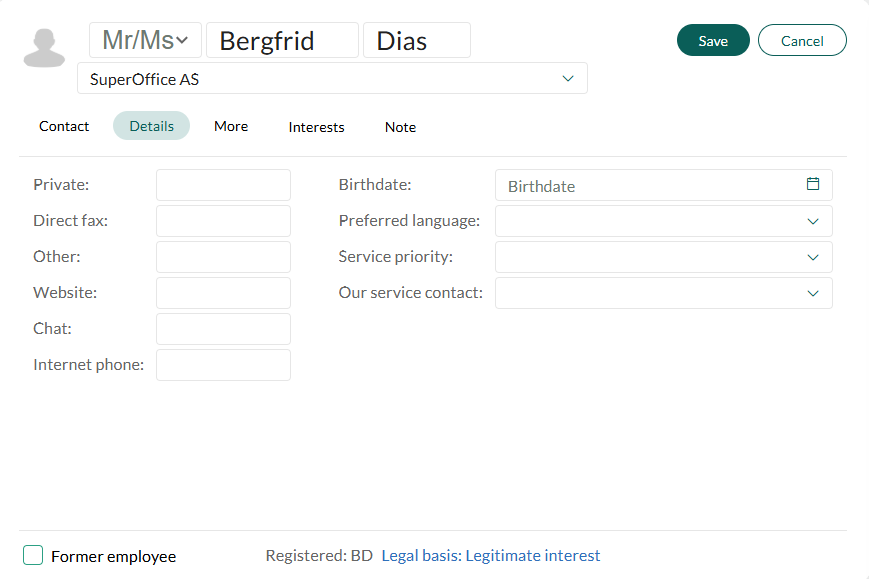
Add further information in the Details tab (optional):
- Enter key details like Position, Birth date, and Preferred language.
- Add contact-specific communication details: Website, Chat, and Internet phone (for example, Skype or Microsoft Teams).
- If applicable, set Service priority and select an Our service contact (requires a SuperOffice Service or Customer Centre license).

Go to the Interests tab to set interests and subscriptions:
- Check the boxes for relevant interests (defined in Settings and maintenance).
- Configure E-marketing/subscriptions for legal consent on email campaigns.
Review privacy settings:
- Click Legal basis at the bottom of the Contact card to review or update GDPR consent and privacy information. Click Close when you are done.
Mark as a former employee (optional):
- Check Former employee if the contact has left the company. Former employees do not appear in contact lists or projects.
Click Save to store the contact details.
The contact information is then saved in the database and displayed in the contact card. If you linked the contact to a company, the contact will be displayed in the Contacts tab in the Company screen.
Key fields explained
The following fields are available in the Contact card. Some fields are filled automatically, while others require input.
Note
Fields and layout may vary based on Screen designer configurations and other UI customizations.
Basic details:
- First name / Last name: At least one of these fields must be filled (mandatory).
- Salutation: Optional. Choose Mr/Ms based on the contact's preference.
- Title: Enter the contact's position or job title.
Contact information:
- Email: Add multiple email addresses with descriptions, such as Work or Private.
- Mobile / Direct phone: Add multiple phone numbers with labels, such as Mobile or Work.
- Press TAB or click outside the table to save entries.
Address:
- Home address: Complete the contact's address details.
- The address format updates automatically based on the Country field.
- Country: Specifies the country of the contact. Defaults to the country linked to the company.
- Use as postal address: Check this box if you want direct mail sent to the contact's address instead of the company address.
Inherited fields:
- Our Contact: Automatically assigns your name. Click the arrow to choose someone else from your organization.
- Category: Select from a predefined list. Defaults to the company's category if linked.
- Business: Select the relevant business type. Defaults to the company's business type if linked.
System fields:
- Number: Auto-generated as the next available contact number if configured in Settings and maintenance. You can edit this manually if required.
Three of the user-defined fields from the More tab may also be displayed here, as defined in Settings and maintenance. The fields displayed can vary from user group to user group.
Add interests
Interests are useful for creating targeted selections, such as marketing campaigns for specific groups. For example, defining reference account as an interest lets you quickly create a selection of all reference accounts.
Go to the Interests tab.
In edit mode, select relevant interests by checking the boxes. Available options are defined in Settings and maintenance.
If you select one or more interests, a dot appears next to the tab name.
Click Save to store your changes.
Tips
You can add multiple phone numbers, emails, and other entries with descriptions (for example, Switchboard).
If you click the contact's email address in the Contact tab, you can click the required email address in the list that appears. A blank email message opens, with the email address entered in the To field.
Use the phone icon to call directly if your system is configured.
If the contact is part of a company, fields like Category, Business, and Our Contact inherit company values but cannot be edited.
Go to the Relations section tab to link this contact to other companies or contacts.