Create a new form
Web forms make it easier to interact with customers and prospects via your website or customer centre. You have three options: create a form from scratch, create and use a custom form template, or select a free template from the Online Template Library in SuperOffice Marketing.
Create new (from scratch)
- Go to the Forms tab.
- If required, click Add folder to create a folder for the form.
- Click the Form button below Create new on the right side of the screen.
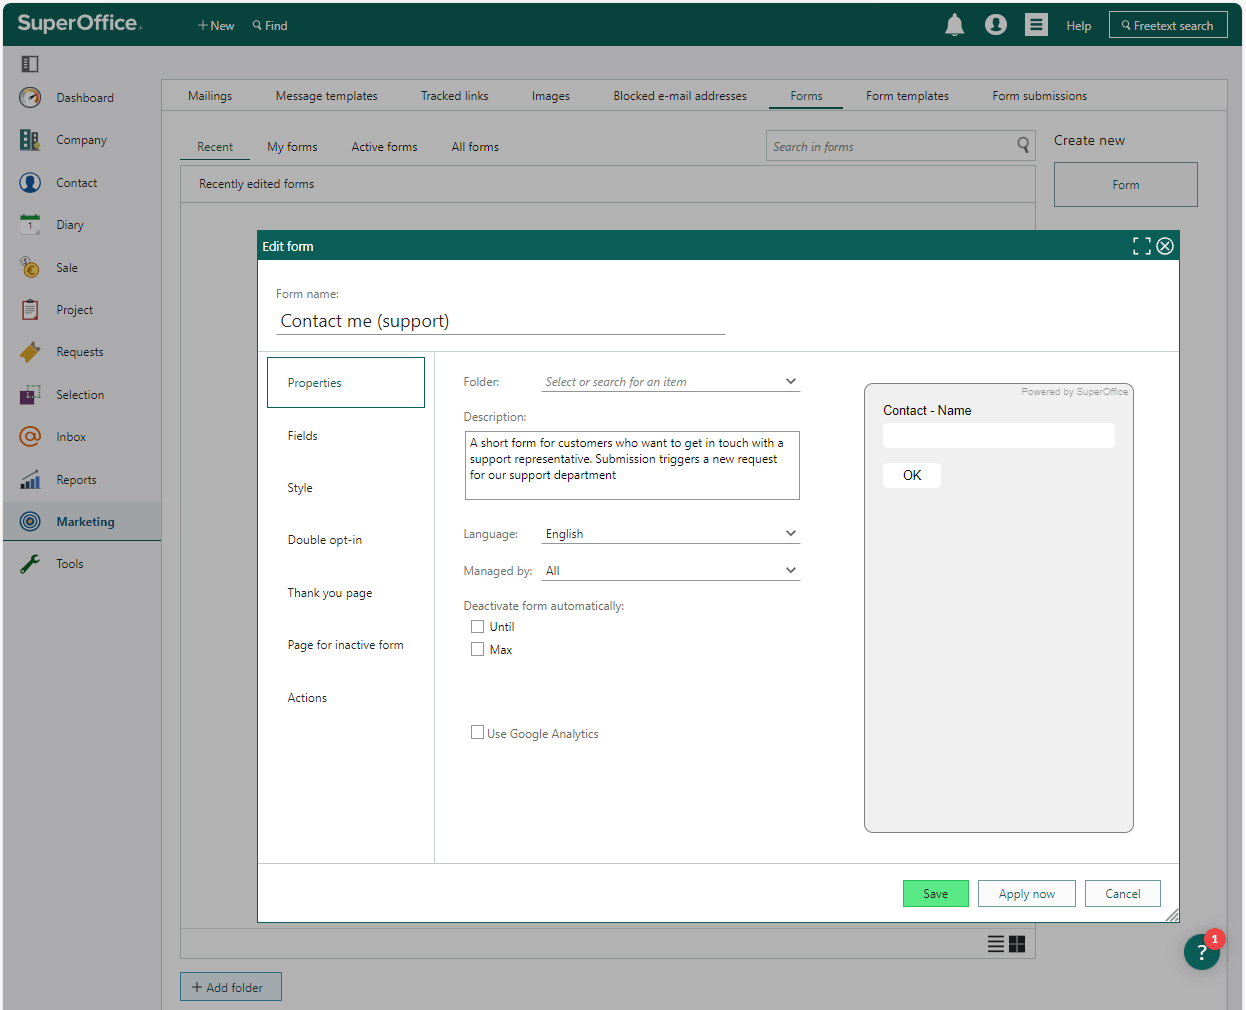
- In the Edit form dialog, enter a descriptive Form name.
- Fill in the fields as described below. Remember to click Apply now regularly to save your work. The form will not be auto-saved.
- Click Save when you are done.
Create new based on form template
- Select the Form templates tab.
- Click All templates.
- Click the menu button next to the template you want to use.
- Select Copy to new form. The template opens in the Edit form dialog.
- Activate and publish the form.
Create multi-page form
To enhance user-friendliness and facilitate readability, consider dividing a form with many fields into multiple pages. Users can navigate through the form using Next and Previous buttons, and a progress bar can be added to indicate the remaining fields.
- Create a form as described above.
- Select Fields from the left menu (in the dialog).
- Click the Add button ().
- In the Add element window, select View elements.
- Select Section and click Add. The window closes and a section is added to the form. You can also see the section In the form preview.
- Click at the top of the section and drag it to the desired position in the form. The fields above and below the section will be on two separate pages in the form.
- Click Apply now when you are done.
- Repeat steps 2-7 to add another section.
Tip
You can add a progress bar to the form, so the user can see how much is left to fill in. Go to the Style category, click the check box next to Progress bar color, and select a color.
Filling in form fields
Tip
Click Show/hide toolbar to display formatting options for the text.
Click Open text editor in dialog () to edit the text in a larger editor.
Properties
Folder: Select where to place the form or create a new folder.
Description: Explain the purpose of this form. This text is visible internally only.
Language: Select the language used in the form.
Managed by: Optional. Select a user group to limit access to this form. Only members of the selected user group can process submissions from this form and receive notifications of submissions.
Deactivate form automatically: Optional. In some cases the form should be active only until a specific date or until a specific number of responses is received. Anyone trying to access an inactive form will be redirected to the page for inactive form. You can combine these options.
- Until: Select a date. The form will be deactivated on this date.
- Max: Enter the number of responses. The form will be deactivated after the specified number of responses are received.
Use Google Analytics: Select this option to track the form and connect it to Google Analytics (if that is set up for your website). In the field below this option, you can enter the Google Analytics tracking ID for this form.
Add fields to the form
In the Fields category you add the fields that should be included in the form. As you add and edit fields, the preview is automatically updated.
Select Fields from the left menu. By default, the Contact - name field and OK button are added to the new form.
Click the Add button ().
In the Add element window, select one of the following field categories:
SuperOffice elements: Fields that are linked to SuperOffice data, such as contact name, country, email address, and so on. Standard and custom fields are available. Depending on the type of field, values from submitted forms can either overwrite existing values or be added to the relevant SuperOffice field. When you enable overwrite for a field, a warning is displayed. If a field is missing or the overwrite option is unavailable, an administrator may have applied a field restriction.
Form elements: Fields for entering text or date, fields for selecting values (lists, checkboxes and radio buttons) and file upload fields.
View elements: Sections, texts and images. Use sections to create multi-page forms.
Select a field in the list. If the list is long, use the search box to find a field by name.
Click Add. The window closes and the field is added to the form and the form preview.
Click at the top of the field and drag it to the desired position in the form.
Select the field and edit the field name if relevant. The original field name will always be displayed in the upper right corner of the field.
You can also edit these settings (optional):
In the Placeholder field, enter a short hint on what to enter in the field.
Select the Mandatory check box if this field must be filled in. The form cannot be submitted if mandatory fields are not filled in.
Click Advanced options () to display the Identifier field, where you can add an ID for the field. This will be a unique ID for this field, and will not change even if the field name/label or the language changes. This way you can ensure that links to this field are not broken after publishing the form.
Click the check box Full width if you want the selected field to be the same width as the form.
Edit any other options in the field as relevant.
Click Apply now when you are done.
Repeat steps 2-10 to add another field. You can also click Duplicate field () to create a copy of a field.
Style
Select Style from the left menu to define the look and feel of the form. For example, set the number of columns, placement of field names, borders, background, font color/size, and form size.
The preview on the right updates automatically when you change any settings. If you do not specify the height and width of the form, the form will automatically adapt to the screen size (desktop, tablet or mobile).
Tip
You can add a progress bar to the form, so the user can see how much is left to fill in. Click the check box next to Progress bar color, and select a color. The progress bar is displayed at the bottom of the form. See also Create multi-page forms.
Choose font
Select a font from the dropdown to apply it to all text in the form. The available fonts are managed by administrators in Settings and maintenance.
The chosen font applies to field labels and all other text elements within the form. You can also use the font size dropdown and formatting buttons to style all text.
Custom styling
For full control over how your form looks, you can write CSS in the Custom styling field. This lets you go beyond the standard editor options and match your brand guidelines precisely.
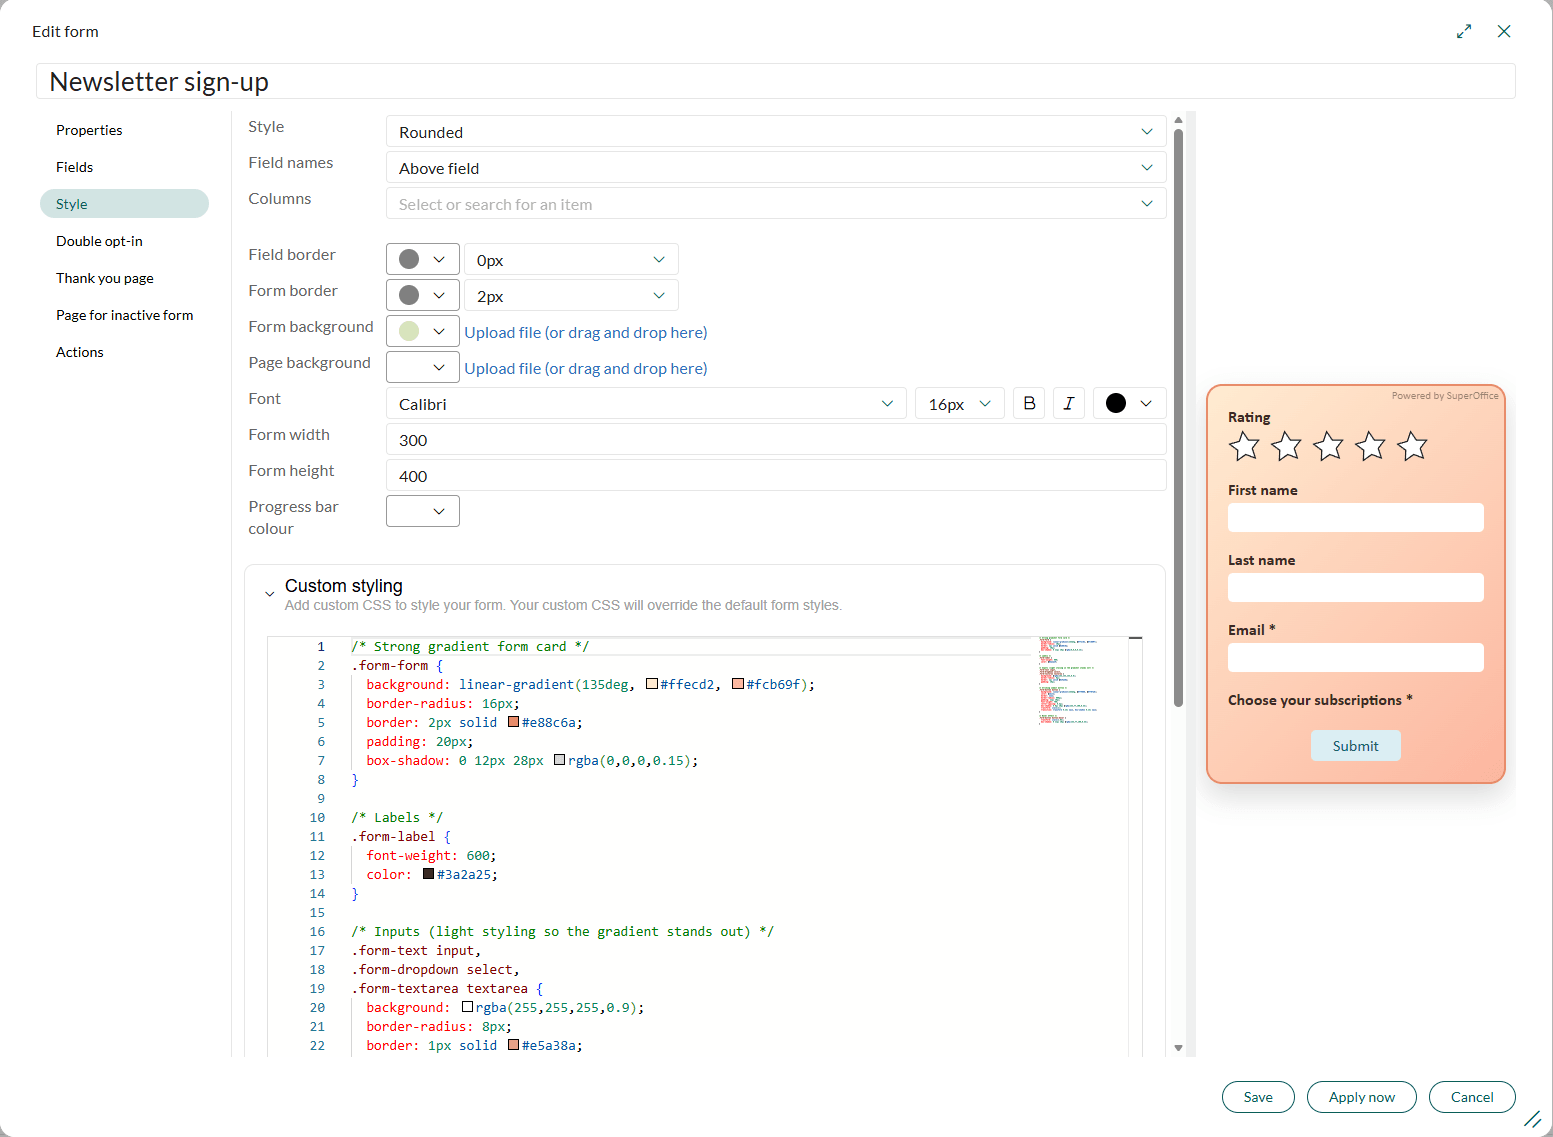
- For experienced users: Type or paste your CSS code directly in the field.
- For less advanced users: Select a CSS class from the list, then add your code. This approach makes styling less overwhelming and gives you better control over what you are changing.
If your organization has AI Lab enabled, you can automatically extract CSS from an existing website instead of writing it manually.

- Enter the URL of the web page whose styling you want to apply.
- Select Extract styles with AI. The extracted CSS is inserted into the field.
- Review and adjust the generated CSS as needed.
The following CSS classes are available:
| Class | Description |
|---|---|
.form-background |
The background or page area surrounding the form. |
.form-form |
The background of the form container. |
.form-table |
The table used to lay out the fields. |
.form-required |
All required fields. |
.form-id-[fieldName] |
A specific field. The selector must end with the field identifier. |
.form-textarea |
Text area or request message fields. |
.form-radio |
All radio button fields. |
.form-checkbox |
All checkbox fields. |
.form-dropdown |
All dropdown fields. |
.form-date |
All date fields. |
.form-datetime |
All date and time fields. |
.form-text |
All text input fields. |
.form-integer |
All integer fields. |
.form-decimal |
All decimal fields. |
.form-textblock |
All text block fields. |
.form-image |
All image fields. |
.form-button |
All button fields. |
.form-uploadfile |
All file upload fields. |
.form-rating |
All rating fields. |
.form-rating-dice |
Rating fields of type "dice". |
.form-rating-thumbs |
Rating fields of type "thumbs". |
.form-rating-smiley |
Rating fields of type "smiley". |
.form-rating-nps |
Rating fields of type "NPS". |
.form-rating-stars |
Rating fields of type "stars". |
.form-consent |
All consent fields. |
.form-recaptcha |
All Google reCAPTCHA fields. |
.form-input |
All input fields. |
.form-pages |
The container of all pages in a multi-page form. |
.form-page |
The container of a single page in a multi-page form. |
.form-page-1 |
The container of a specific page (1..n) in a multi-page form. |
.form-pagefooter |
The footer of a multi-page form. |
.form-pageprogress |
The progress bar of a multi-page form. |
.form-label |
Field labels. |
Activate double opt-in (optional)
Double opt-in is an extra step in the form submission process that will guarantee that people submit the correct email address.
Click Enable double opt-in.
In the Message tab, enter the text to display after the form is submitted.
In the Email tab, create the confirmation email sent to the persons submitting the form.
Subject: Enter the subject of the confirmation email.
Sender address: Enter the email address to display in the From field in the confirmation mail.
Confirmation text: Enter the body text of the email.
Select Insert confirm link () from the toolbar (click to show). The confirmation link is inserted in the body text. To edit the link, click it and select Edit link ().
Click Apply now when you are done.
If double opt-in is activated for a form, all submissions for this form have status Awaiting confirmation until the email address is confirmed.
Note
Remember to add the Contact - email field in the Fields category.
Thank you page
When a person completes and submits a form, you should thank them and let them know what will happen next. It is always nice to say thank you. People really appreciate it.
Use the "Thank You" page to promote other products or events, linking to relevant parts of your website. This enhances the user experience and fosters customer loyalty.
Choose one of the following options:
- Redirect to external website: Enter the link to the web page with more information.
- Show this message: Enter the text to display.
Page for inactive form
If a person opens a form that is inactive, you can either redirect them to another web page or display a message.
- Redirect to external website: Enter the link to the web page.
- Show this message: Enter the text to display.
Actions
Here you can define what happens when someone submits a form response.
- Notify of submissions by creating requests
- How should a form submission be processed?
- What should happen when the form is processed?