Send a quote
After you add products and create a quote document, you can send the quote to the customer. The quote is marked as Sent and locked for editing.
Prepare the quote
Go to the Quote section tab on the sale and click Open to edit the quote.
Confirm the following:
- All required product information is filled in.
- The quote document is created.
- Relevant attachments are selected in the Attachments tab (if required). These files will be included when you send the quote to the customer.
- The correct alternative is set as the Favorite alternative.
- No warnings are present.
Note
You cannot send a quote if it has warnings, errors, or needs approval. The Send button appears dimmed until all issues are resolved.
Approval required?
Some quotes must be approved before sending, for example, if the earnings are too low or a discount is too high. Approval requirements are set per sale type in Settings and maintenance. Go to Settings and maintenance > Lists > Sale - Type, Stages, Quote.
- If approval is required, the quote gets the status Needs approval
- A banner appears in the Edit quote dialog, and warning icons are shown
To approve a quote
A user with approval rights opens the quote.
Click Approve or Reject.
The status updates to Approved () or Rejected ().
Send the quote
In the Edit quote dialog, click Send.
The Publish/send a quote dialog opens.
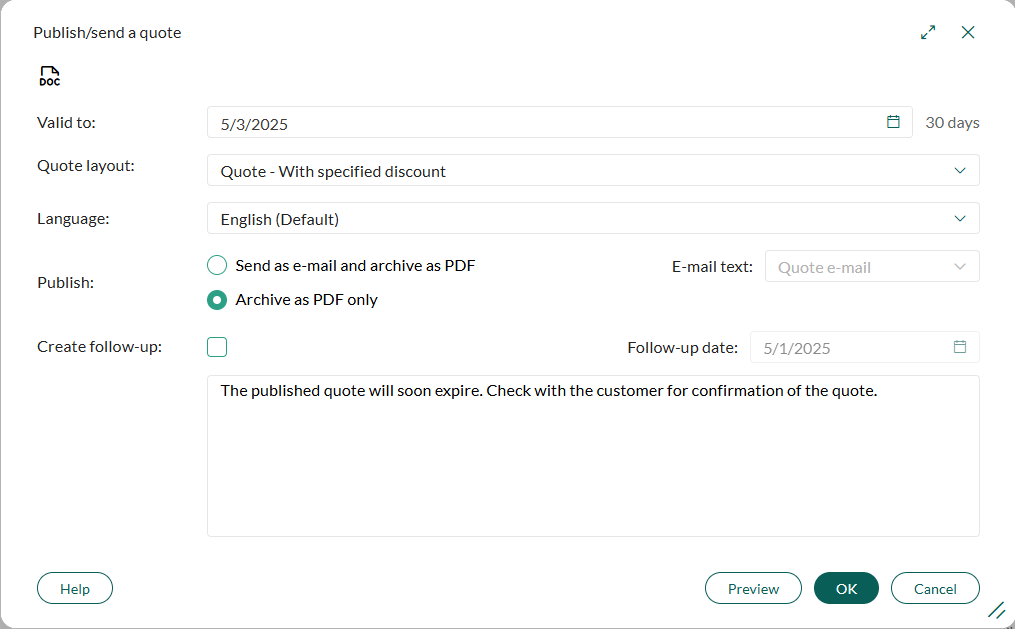
In the Valid to field, adjust the expiration date of the quote (default is 30 days).
Choose the Quote layout (template) and Language for the quote.
If the quote contains alternatives, you can select Use favorite alternative only to include just that one. Otherwise all alternatives are included in the quote.
In the Publish section, select how the quote should be delivered:
- Send as e-mail and archive as PDF (select an e-mail template)
- Archive as PDF only (you must send the quote separately)
(Optional) Select Create follow-up, then enter a note and select a follow-up date to create a reminder to yourself.
Click Preview to review the quote PDF.
Click OK to send and/or archive the quote.
If sending by email, the New email dialog opens so you can customize the message.
After sending
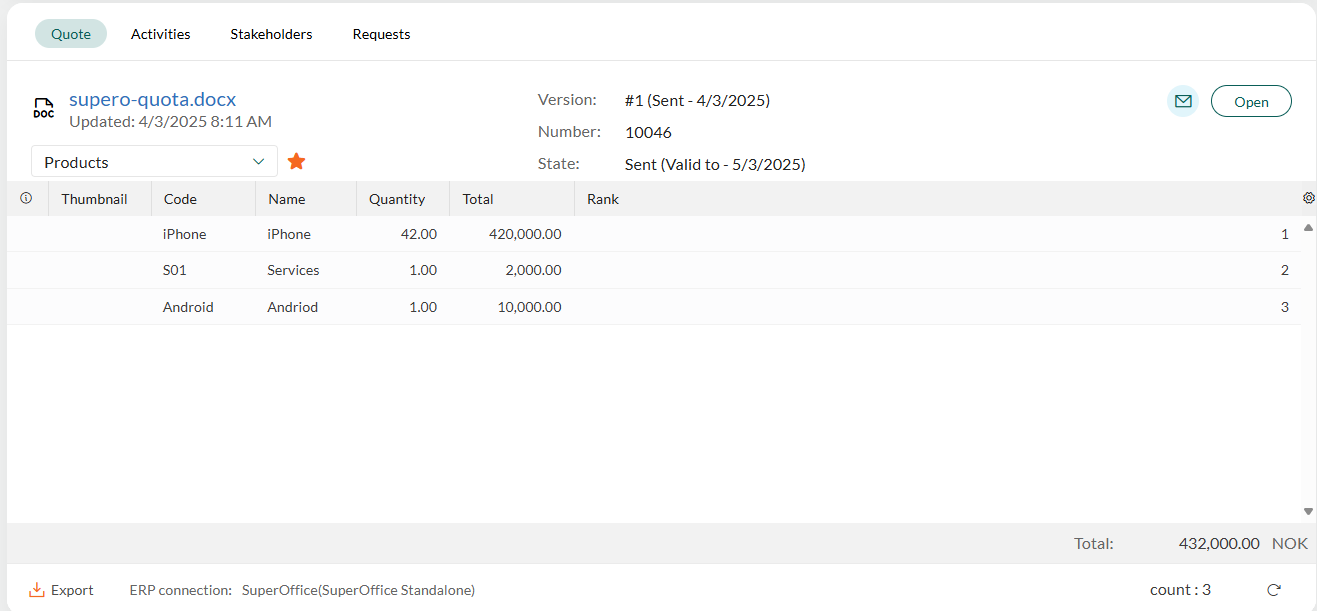
The quote is marked as Sent.
The current version is locked.
The State includes the expiration date (for example: Sent (Valid to - 5/3/2025)).
The icon changes from to an envelope ().
The PDF is archived in the Activities section tab.
Edit a sent quote
After sending, the quote becomes read-only. To make changes (for example, in response to a customer request), you must create a new version.
- Click Open on the Quote section tab.
- In the Edit quote dialog, click Edit.
- A new version is created with the status Draft. The previous version is archived ().
You can toggle between versions using the Version dropdown at the top of the dialog.
Tip
Changes in the new version do not affect the original. You must send the new version when ready.
Related content
- Create a quote document
- Replace the quote document
- Place an order
- Configure quote approval rules in Settings and maintenance