Respond to a chat
Incoming chats are indicated in the following ways:
- A number icon on the Dashboard tab shows how many incoming chats have not been answered by an agent.
- In the Incoming chat list in the Dashboard tab. Double-click a row to respond to a chat.
- In the Chats tab, the In queue field shows how many chats are waiting for a response.
- A warning appears if a chat is not answered within a specified amount of time. This warning is shown only if your status is Present.
To make sure that you offer quick and professional answers to your customers' chat queries, SuperOffice Chat offers a number of options to speed up and improve your chat replies.
Save time by using pre-defined texts when answering customer queries through chat. You can create and send a quick reply to a commonly asked question. In other situations, where quick replies aren't sufficient, you can include FAQs, customized reply templates, or files.
Setting your status (Present/Away)
Set your presence in the upper-right corner of the Chat screen.
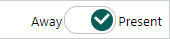
- Present: You receive warnings for unanswered chats.
- Away: You do not receive warnings but can still respond to chats. If all agents are away, customers see the offline form when they start a chat.
Steps
Click Chat in the Navigator.
Ensure your status in the upper-right corner is set to Present.
Click Get next in queue to claim the next unanswered chat.
To respond to a specific customer, go to the Dashboard tab, find the chat in the Incoming chat list, and double-click the row.
In the message field, type your response and press ENTER or click Send to chat.
- To personalize your response, try to locate the customer in SuperOffice. This lets you view relevant information in the side panel.
- To add emojis or stickers, click next to the text field.
To send additional information during the chat:
If you are unable to help the customer, do one of the following:
- Transfer the chat to another agent.
- Create a request from the chat.
When the conversation is over, click and select End chat, unless the customer closes the chat window first. The chat is moved to Recent chat sessions, and a record is also saved in the Activities section tab in SuperOffice CRM.
Note
If the post-chat form is active for this chat channel, the customer may return to the chat. The chat will be reactivated.
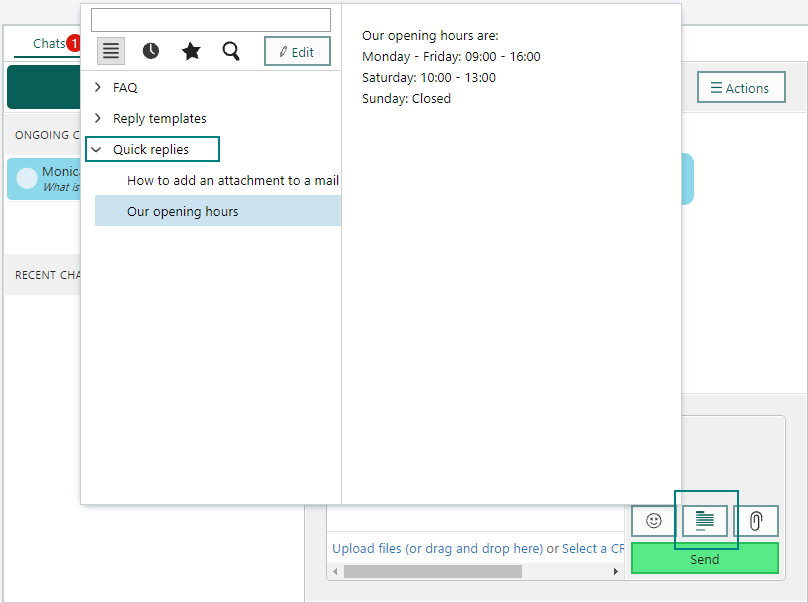
Insert FAQs, reply templates, or quick replies
To save time, insert predefined text instead of typing full replies.
Click in the chat panel.
Select one of the following:
- FAQ: Inserts a link to a published FAQ in the customer centre.
- Reply templates: Inserts reusable message content.
- Quick replies: Inserts a personal text snippet.
You can search, browse folders, or use the icons for history and favorites.
Press ENTER or click Send to send the message.
Create a new quick reply
- In the Quick replies dialog, click .
- Click Add. A new entry is added to the list.
- In the New name field, enter a title for the quick reply. This is not visible to the customer.
- In the New content field, enter the reply text.
- Click Save. The reply is added to your personal list and can be used during chats.
Send files in chat
You can send documents or files during a chat session.
- Click in the chat panel.
- Choose one of the following:
- Click Select a CRM document, search, and select a file from SuperOffice.
- Click Upload files, select the file, and click Open.
- Drag and drop a file directly onto the upload area. Ensure →Move appears next to your pointer when you drop the file.
The file is sent immediately.