Manual steps to install Service
From SuperOffice 8.1 both SuperOffice Web and Service must run on the same root domain. It will be easier to create Application Routing Routing rules (ARR) if you do the manual installation and place Service in a sub-application.
Installing SuperOffice Web client and Service on the same domain under different applications requires some manual steps for Service.
Warning
From SuperOffice 10.2.5, SuperOffice Web and Service must run on HTTPS. The in-app editor does not support HTTP.
Install Service
If the IIS website is not created, first run the installer for Service (SuperOffice.CustomerService.exe) which is the only installer from SuperOffice that will also create the IIS websites.
If the website is created, then you may create the application first, and just point the path to the default location for Customer Service: C:\SuperOffice.
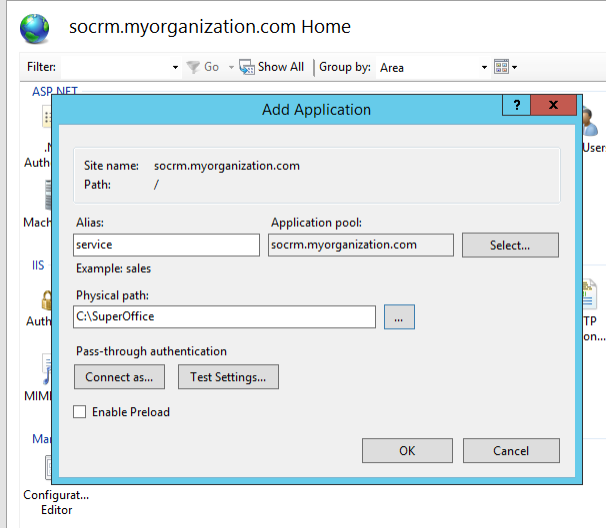
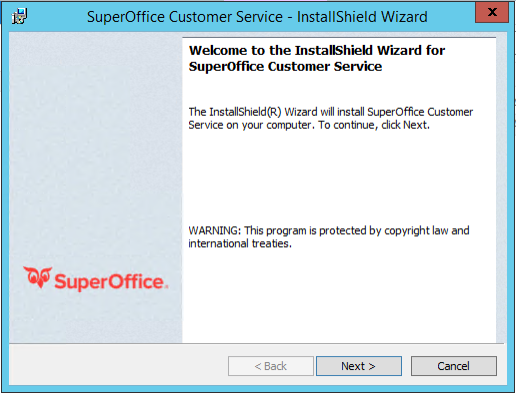
Run SuperOffice.CustomerService.exe to install the software on the server, the default location is C:\SuperOffice.
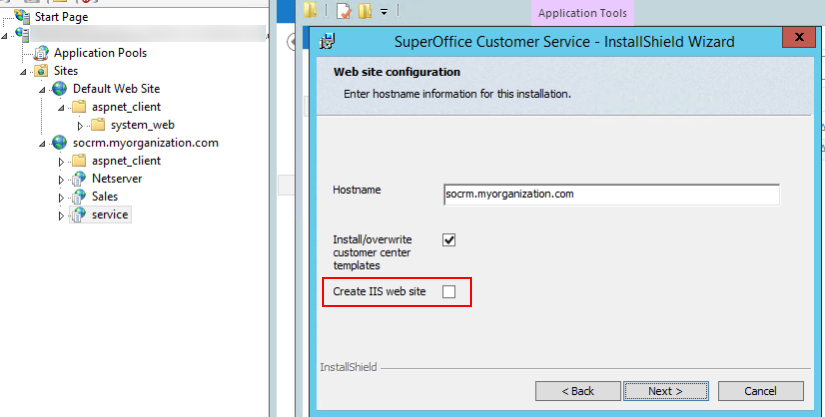
If you upgrade an existing site, do not tick the Create IIS website since it will cause the installer to fail. We will create/update the application manually.
Either set up a new application under socrm.myorganization.com for Service or edit the one you created earlier. Point the physical path to the Customer service\www\doc folder, in this example, it would be C:\SuperOffice\Customer Service\www\doc folder.
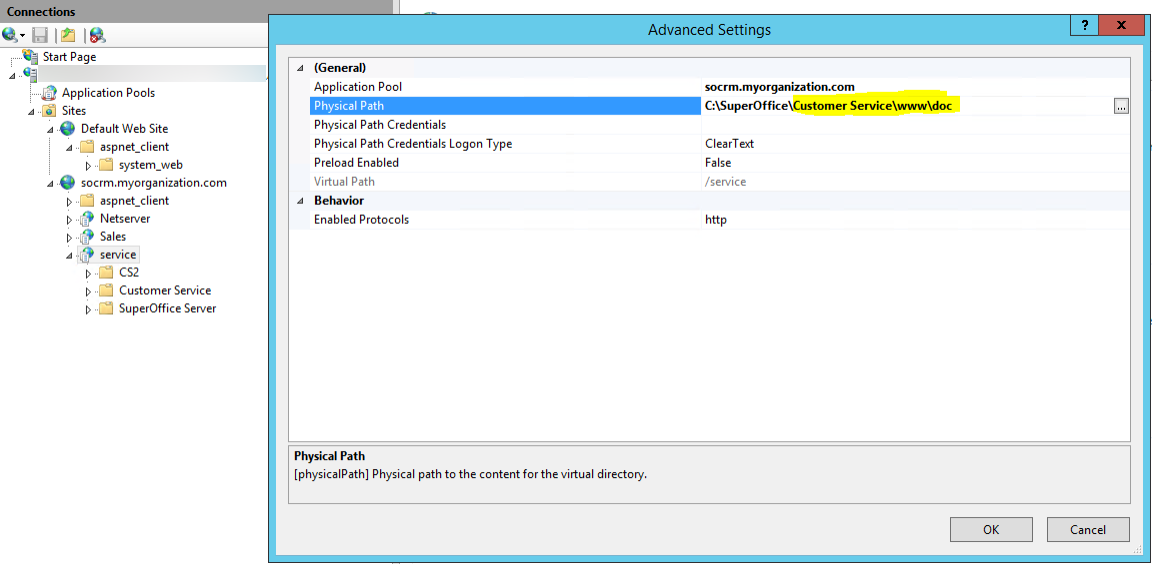
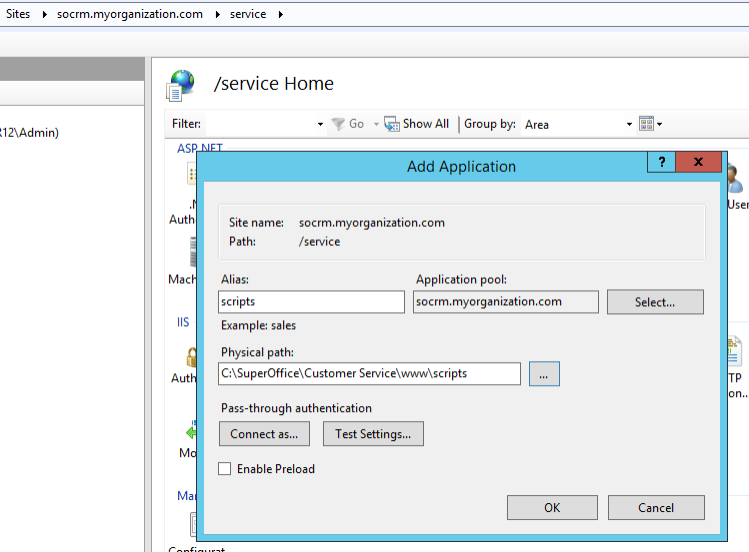
Below service, you also need to add 2 applications, one for scripts, which points to the Customer Service\www\scripts folder. Make sure it uses the same application pool as the Service application.
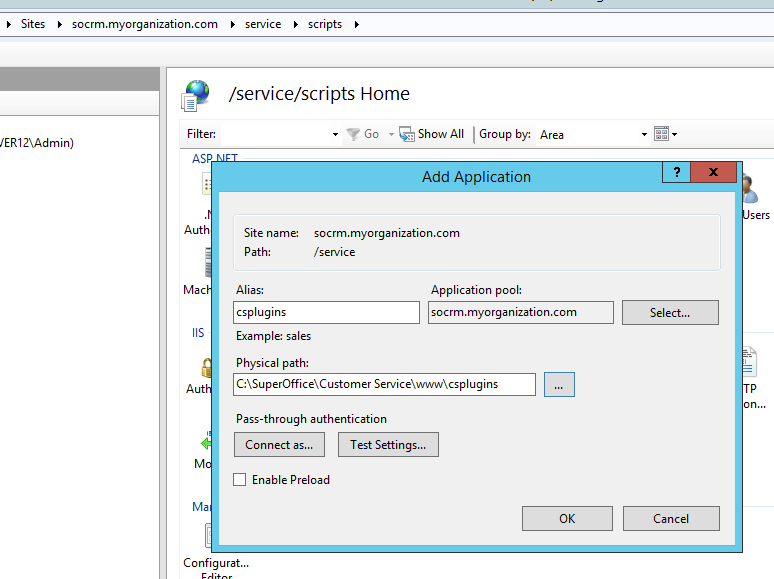
And one application for csplugins pointing to \customer service\www\csplugins.
Make sure NetServer is available first
You need remote web services / NetServer installed on the same domain, in this example, we have used socrm.myorganization.com/netserver. This is installed by using the web installer to the Sales web client, and in the product configurator, tick the Expose NetServer web services on the Security chapter.
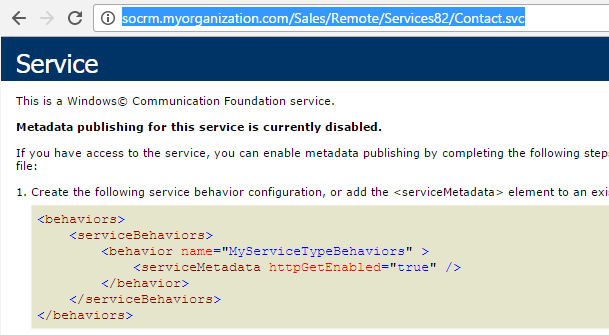
Browse to http://socrm.myorganization.com/Sales/Remote/Services84/Contact.svc to verify before the ejTermSetup.exe is run to prime the database for Service.
Continue with priming the database for Service
ejTermSetup.exe is only run for NEW installations.
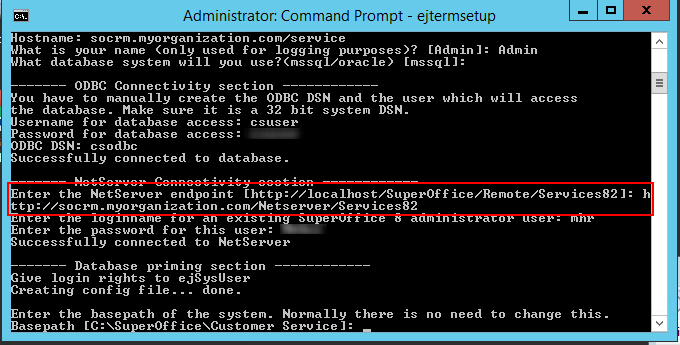
Now run ejTermSetup found in the Bin folder, when asked for Hostname give the path including the application, socrm.myorganization.com/service which will correctly set the value for database table registry where reg_id = 109 to /service/.
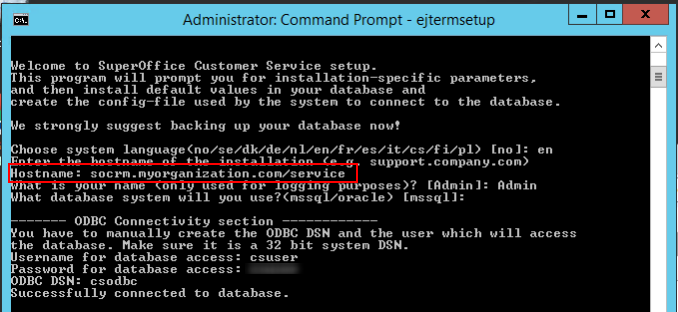
When ejtermsetup later asks for The full HTTP Path to your server (for URLs), then just use the hostname without sub-application, like http://socrm.myorganization.com. It will in most cases default to the correct URL.
When asked for the NetServer URL you give the URL for NetServer created on the same domain.
Note
Service does not support HTTPS connection to NetServer, so only HTTP is allowed.
From SuperOffice 8.1, all authentication for all clients will be done by the web client, and after successfully authenticating a session key is stored in a browser cookie. This is why Sales and Service must be installed on the same domain.
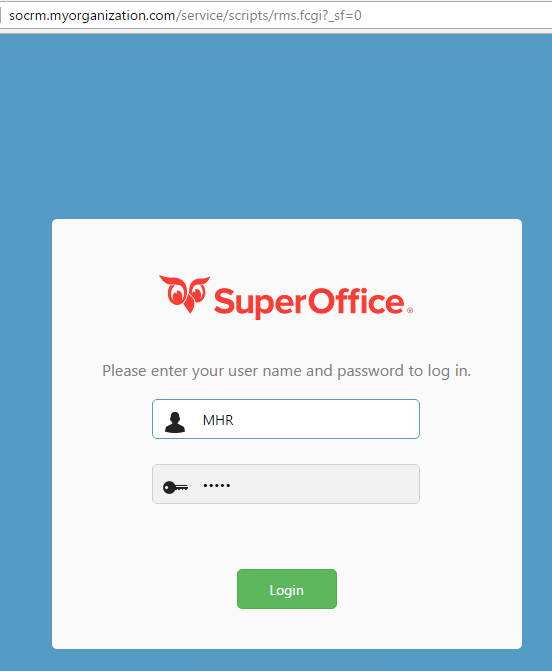
After completing the ejTermSetup you may start https://socrm.myorganization.com/service/scripts/rms.fcgi (or.exe) - note that if your screen is completely missing pictures, then it's the reg_id=109 that has a wrong value.
Verify the database registry and config table values
If Service is installed in a sub-folder of the domain named service, then
select * from crm7.registry where reg_id = 109
should have value /service/

select cgi_bin, cgi_url, cgi_url_internal from crm7.config
