Add a sync connector and ERP connection
Note
This feature requires a license for Development Tools or the CRM Suite Core plan.
To synchronize data between SuperOffice CRM and an ERP system, you must first install a sync app. Then, in Settings and maintenance, you must add a sync connector and configure one or more ERP connections.
1. Install the sync app
Before you can add a sync connector, you need a sync app for your ERP system.
Check the SuperOffice App Store for a standard sync app that supports your ERP system.
If no standard app is available, or if you require a customized version, you can have one developed by a SuperOffice partner or your in-house team.
Follow the app provider's instructions to install and register the connector.
2. Add a sync connector
In Settings and maintenance, select Quote/Sync in the navigator.
Open the Sync tab.
Click Add below the Sync Connectors list.
Enter a name and the connector URL.
Click OK.
The sync connector is added to the list.
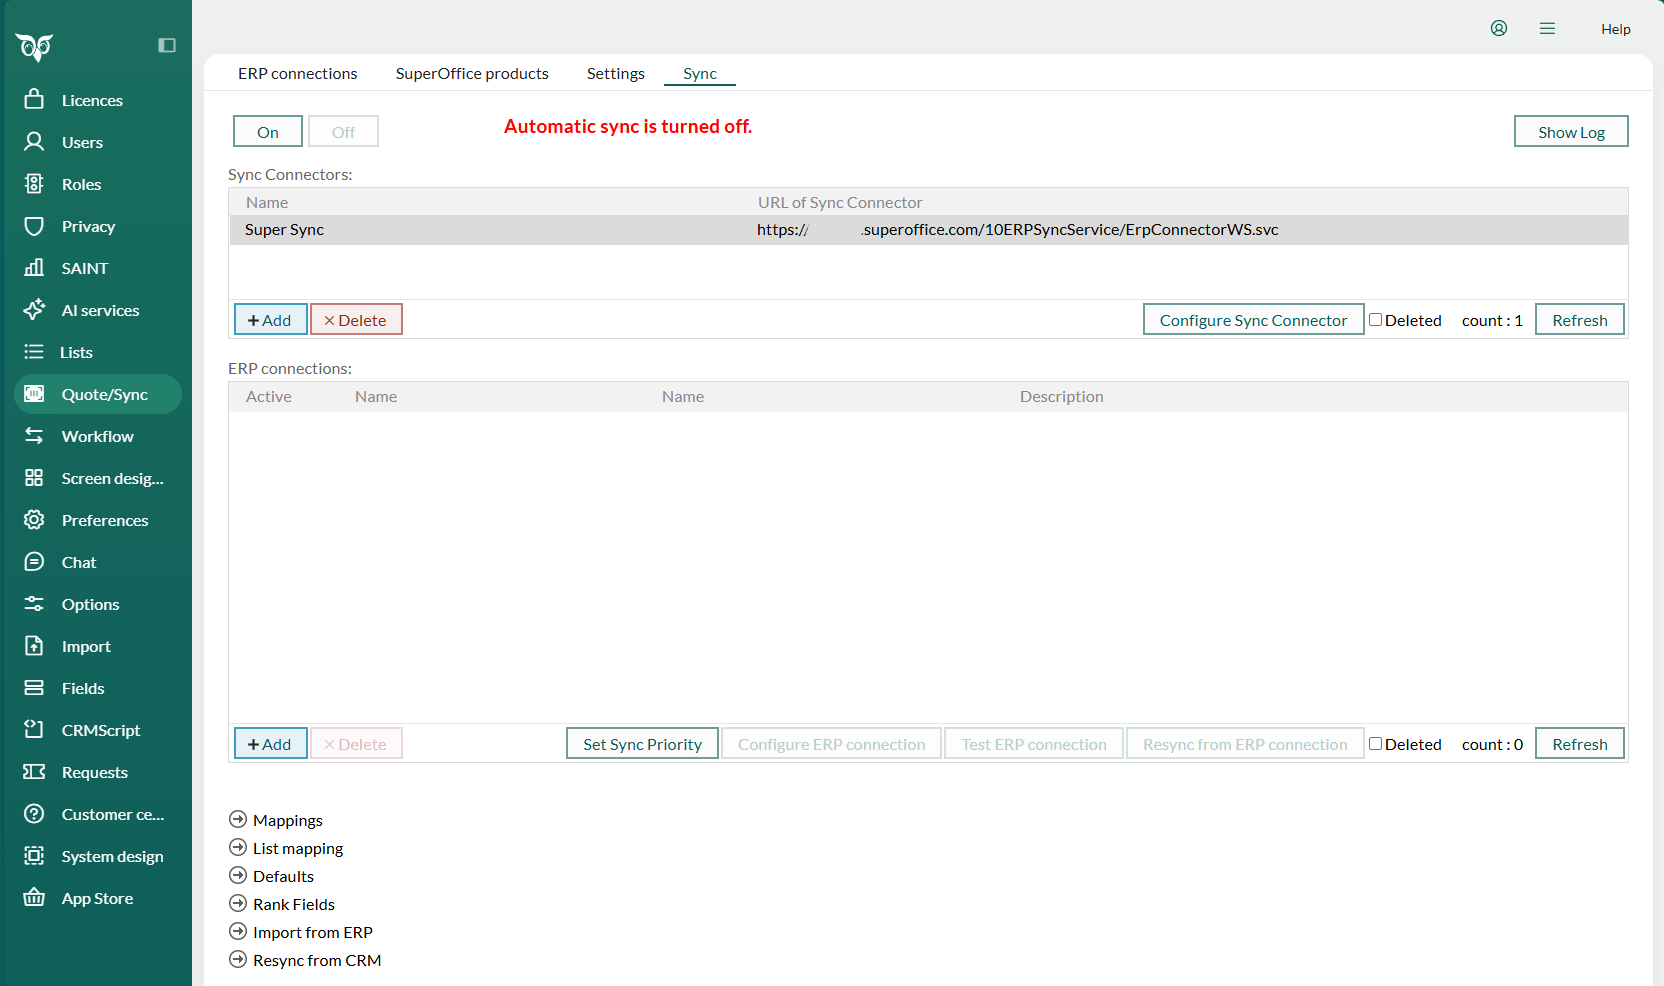
3. Add an ERP connection
In the Sync tab, click Add below the ERP connections list.
The Define new ERP connection dialog opens.
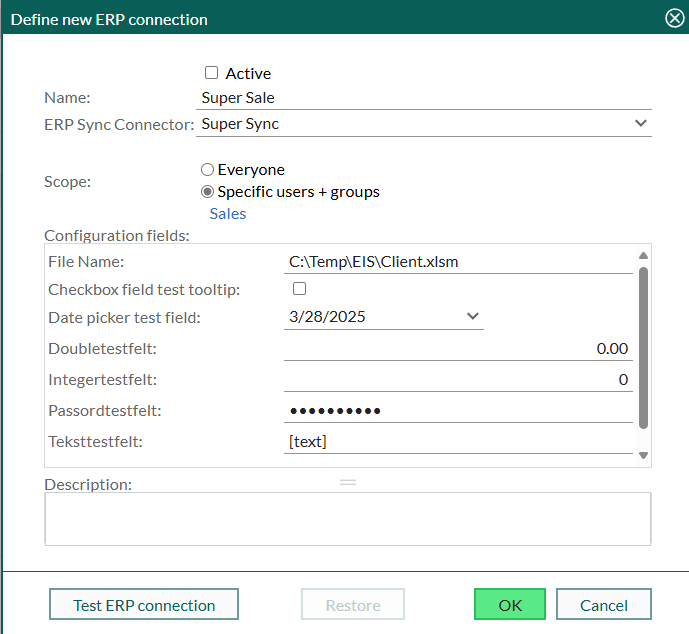
Enter a name for the ERP connection.
Select the sync connector to use from the list.
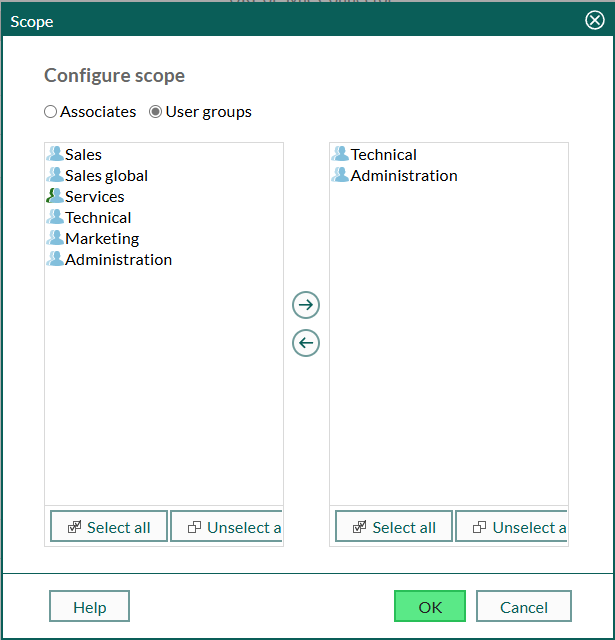
Define the scope:
Everyone: All users can access and use this ERP connection.
Specific users and groups: Only selected users and groups can access it. Click the link to open the scope dialog and select access.
Fill in the configuration fields. These are specific to the selected connector and may include authentication, file paths, numeric settings, or other technical values.
Optionally, enter a description to clarify the purpose of this connection.
Click Test ERP connection.
If the test fails, check the connector URL and the configuration fields. You must fix the issue before continuing.
Click OK to save the connection. The new ERP connection appears in the list.
If the OK button appears dimmed, it means either the test has not succeeded or some mandatory fields are missing.
Note
Before the ERP connection can be used, you must configure synchronization settings and activate it. See Configure ERP connection.
Next steps
- Configure field mapping and lists
- Define default values
- Select the order of the ERP fields displayed in the ERP tab in SuperOffice CRM
- Set sync priority
- Import data from ERP