Customize order confirmation template
In this tutorial, we will use an order confirmation template as a basis to create a new template.
We will:
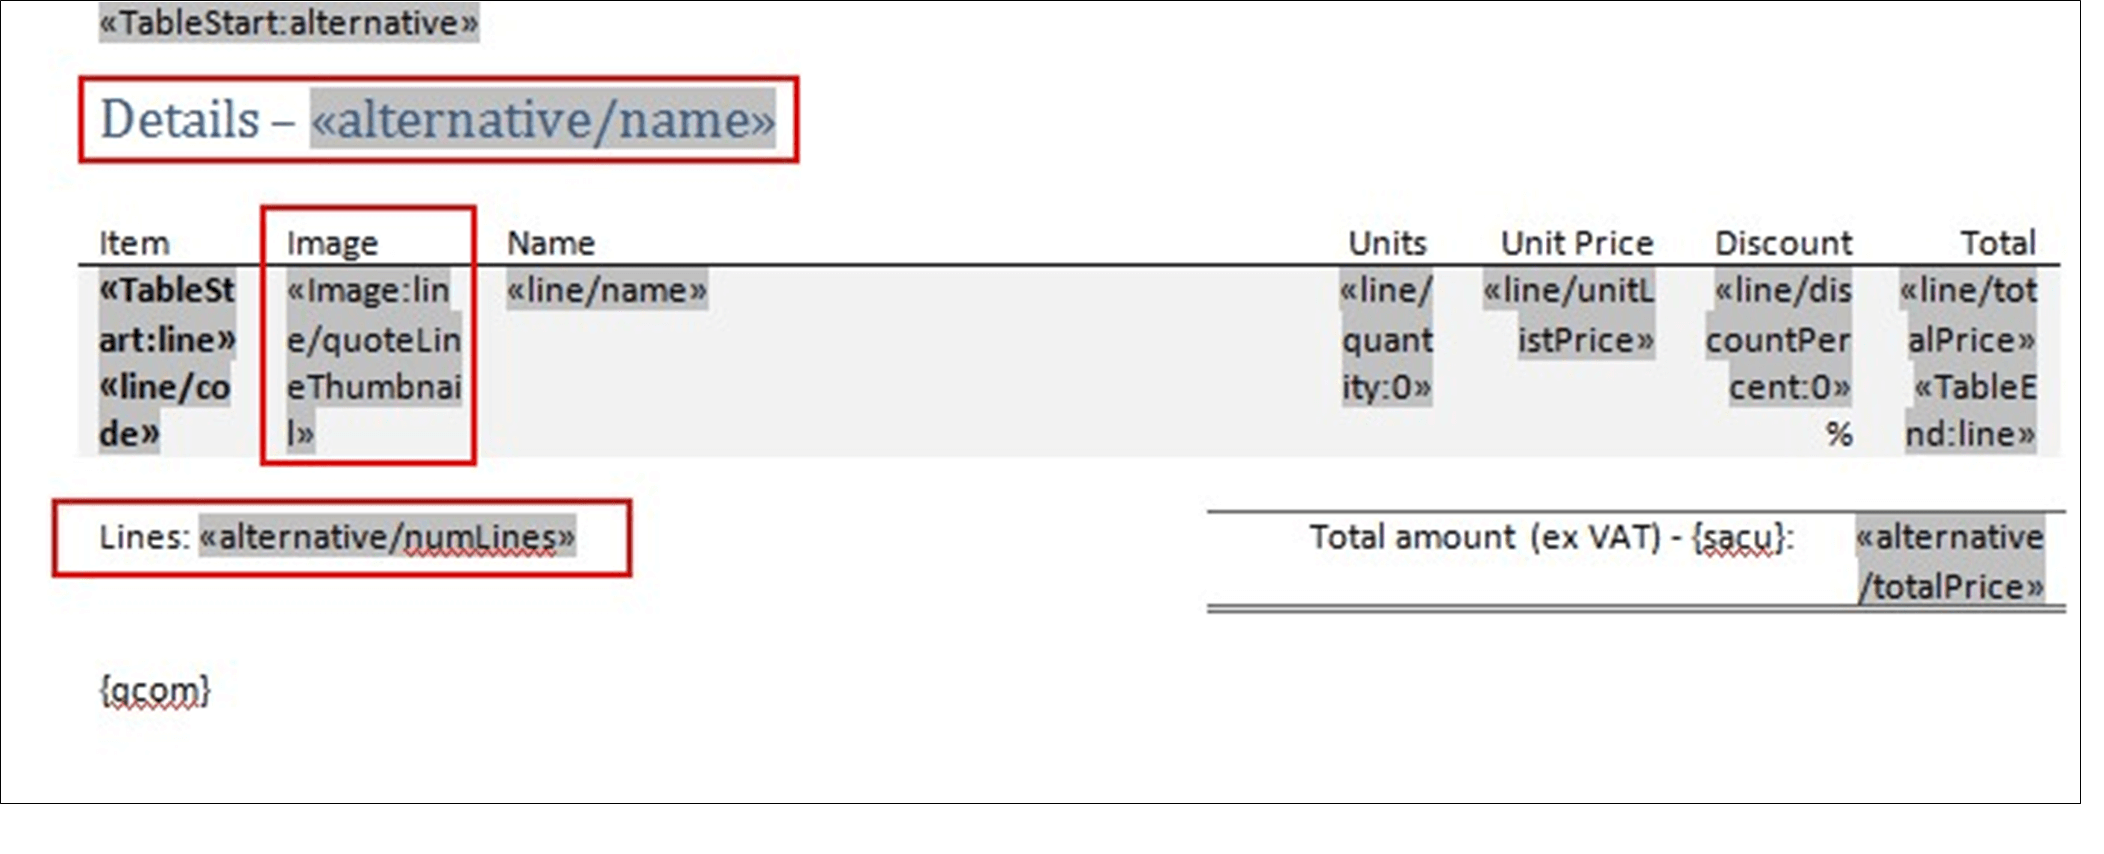
- Add the name of the alternative (taken from the quote).
- Add the number of lines in the alternative.
- Add a thumbnail of the product.
- Sort the products by product name.
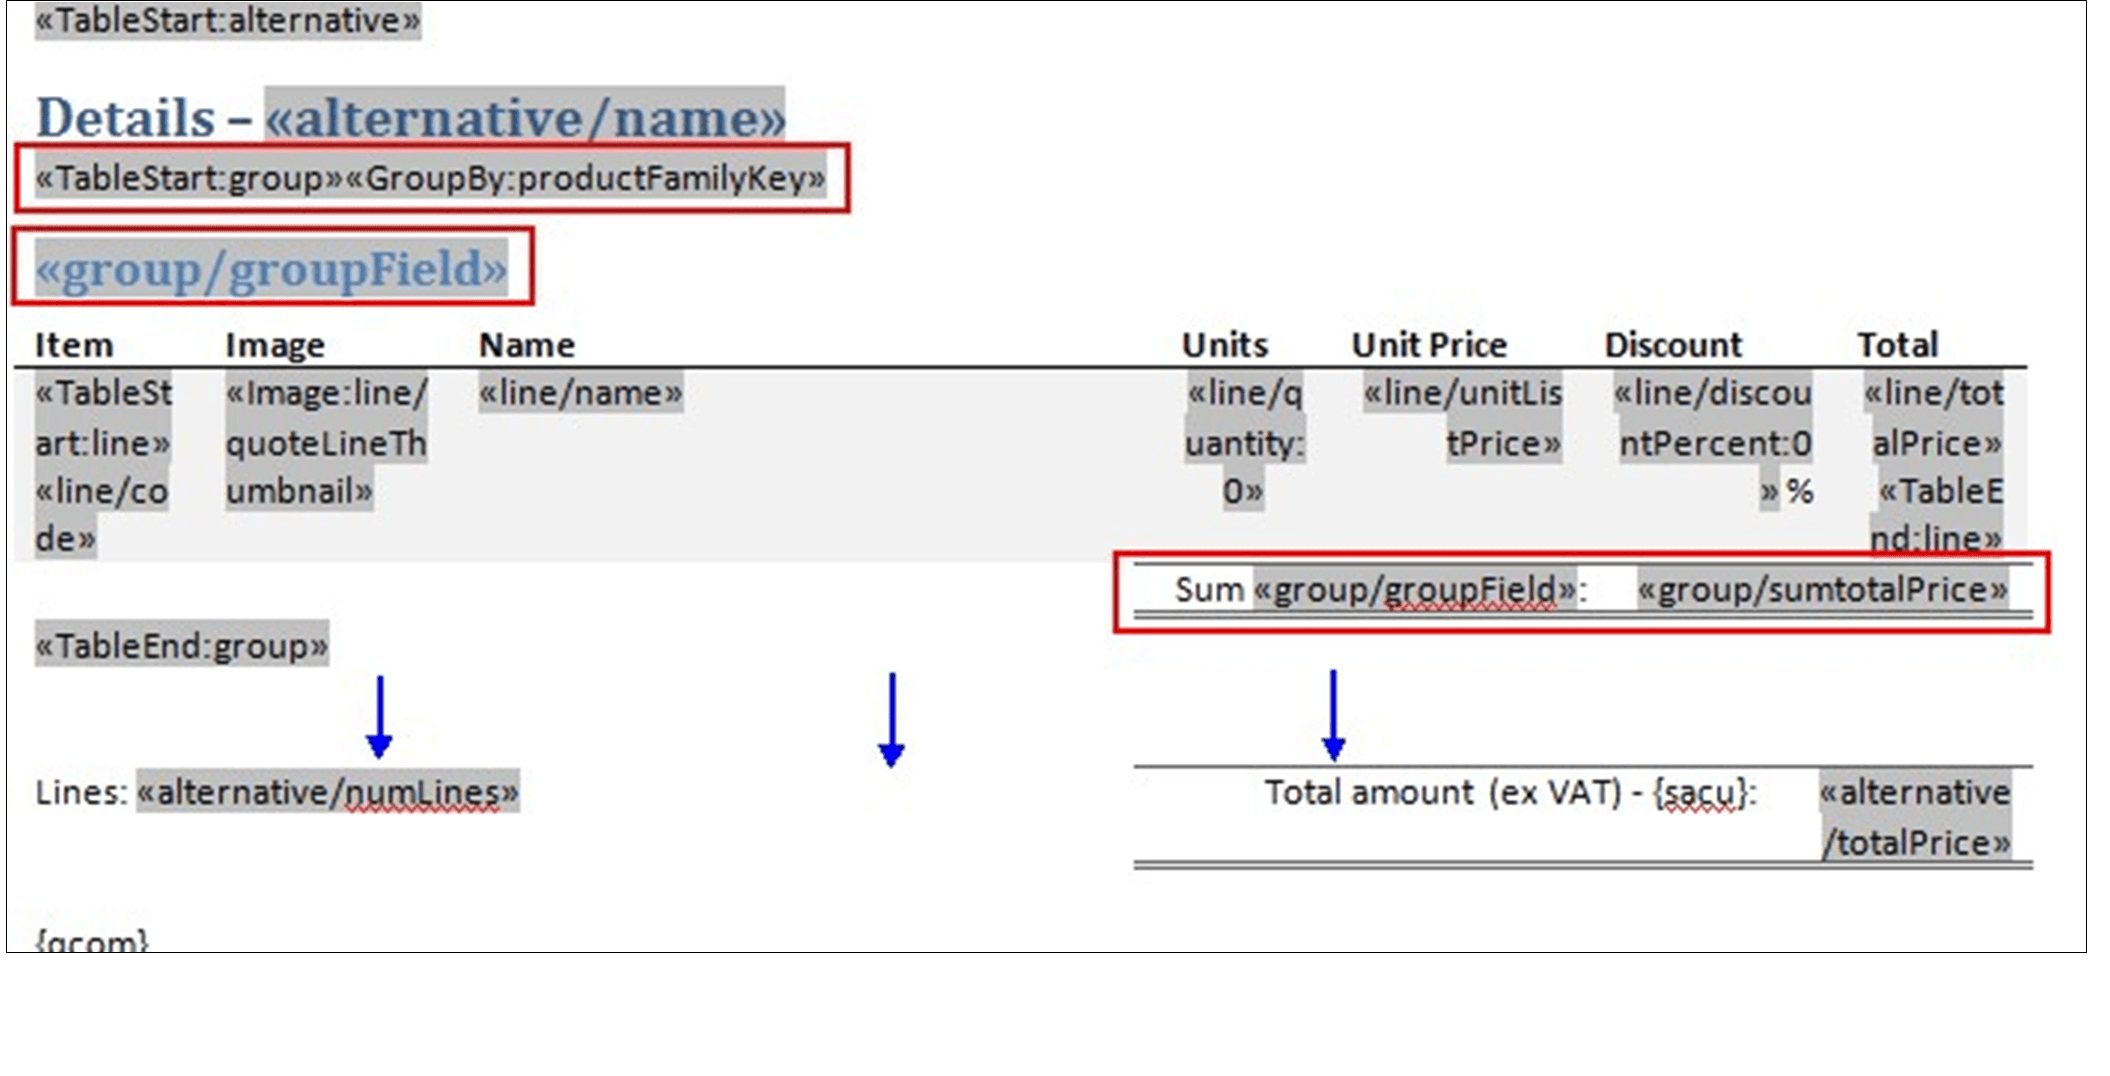
- Group the products in the template document by product family. A product family could for example be "hardware", "software" or "accessory".
- Enter a sum total for the products in each group, but retain the sum total for the alternative that already exists in the template document.
Preparations
Create a sale for testing the template
In SuperOffice CRM, create a quote with various products from different product families to test the grouping feature.
Ensure the sale has the same type as the one you will link the template to (later in this tutorial).
In the quote, click Place Order to enable the Show Confirmation button.
Select the fields to be displayed
- Verify that the required product fields are visible in the Configure Product dialog.
- Only fields marked as visible in Settings and maintenance will appear in the template.
Copy the template to be modified
- In Settings and maintenance, select Lists from the Navigator.
- Click the arrow and select Document - Template.
- Double-click the Order Confirmation template and click Edit to open it in Microsoft Word.
- Save the document with a new name in an easily accessible location.
- Add the template document.
- Name the document logically, such as Order Confirmation – Grouped.
- Check the Quote document type option to make it available for quotes in SuperOffice CRM.
- Select the Template for order confirmations type.
Link the template document to a sale type
- In the Lists screen, double-click Sale - Type, Stages, Quote.
- In the List items overview, double-click a sale type to open the Edit list item dialog.
- Go to the Default values tab, open the Order confirmation template list, and select your new template.
- Click OK to save your changes.
Modify the template
In this section, you will learn how to modify the template document by inserting fields, adding product images, grouping products, and choosing sorting orders.
Insert fields in Word
Open the template document from the Document - Template list.
Copy an existing field from the template. Ensure you copy the entire field, including the «» brackets.
Paste the field into your template after the title ("Details").
Right-click the pasted field and select Edit fields. In the Field name box under Field properties, enter alternative/name (without «»). Click OK.
Note
It is important that you distinguish between capital and lower-case letters when you type in the field names.
Copy an existing field (again) and paste it below the product table (left-aligned on the same row as the sum total for the alternative).
Enter alternative/numLines as field name and click OK.
Enter the label Lines: to the left of the numLines field.
Insert a new column with the title "Image" (
Image:line/quoteLineThumbnail.)Your template should now look like this:

Save the template document, but do not close it.
View the order confirmation in SuperOffice CRM (optional)
To ensure your changes are correctly reflected, follow these steps to view the order confirmation:
- Open a sale of the same type to which your template is linked.
- Navigate to the Quote tab within the sale and click Open.
- Click Place order if you have not done so already.
- In the Edit quote dialog, click Show confirmation. The order confirmation will open as a PDF file.
- Verify the order confirmation:
- Ensure all table content displays correctly, with no numbers split over two lines.
- Check that no field names appear in the document; if they do, you might have used incorrect field names.
- Confirm that all inserted fields are present. Missing fields might indicate that the required data is not available in the quote or product.
- Make any necessary adjustments to the template and save it.
- Review the order confirmation again to ensure all changes are correctly displayed.
Specify sort order
Insert the OrderBy field in the template document.
«TableStart:alternative»«OrderBy:name»
Products will now be sorted by product name within each alternative. After defining the grouping area, products will also be sorted within each group.
Specify the grouping area and key
- Insert
«TableStart:group»before TableStart:line. - Insert
«TableEnd:group»after TableEnd:line. - Insert
«GroupBy:productFamilyKey»anywhere in the document to define the grouping key.
Add group-specific fields
Move the table with the sum total for the alternative (including the total number of lines) down a few lines, so that you have room to insert the group fields between TableStart:group and TableEnd:group.
Between the title and the table containing the products, insert
«group/groupField». Give the field a header style.This is the title of the group (the name of the field by which the products are grouped).
At the bottom of the column with prices, insert
«group/sumtotalPrice».This is the sum total for the entire group.
In the cell to the left of the sum total for the entire group, insert
«group/groupField». Type in the label Sum to the left of the field.
Save and verify
Your template should now look like this:

Save the template document and verify as described above.