Add attendees and resources to follow-up
When you create a follow-up that concerns other people, you can add them as attendees to the follow-up. You can also book your organization's conference rooms and equipment. People who are available as attendees are defined in Settings and maintenance.
Steps
Note
Only the owner of the follow-up can add (and remove) attendees.
Click the Invite button. This expands the dialog.

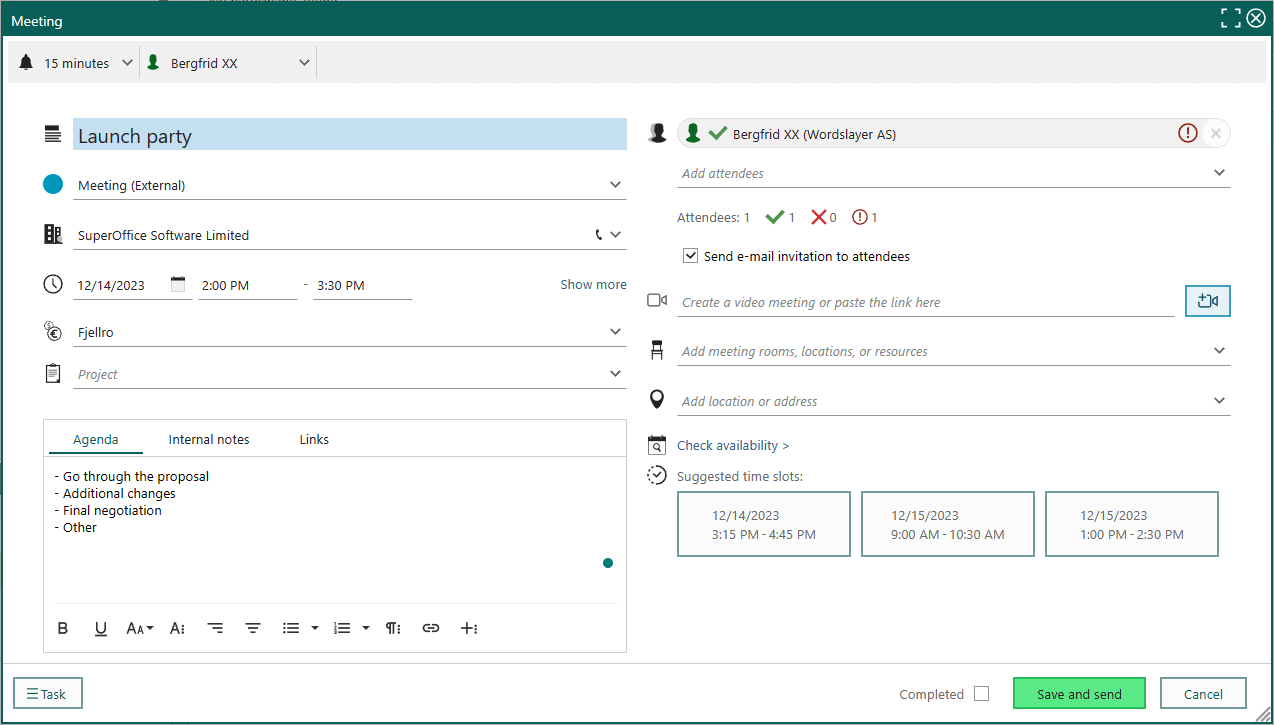
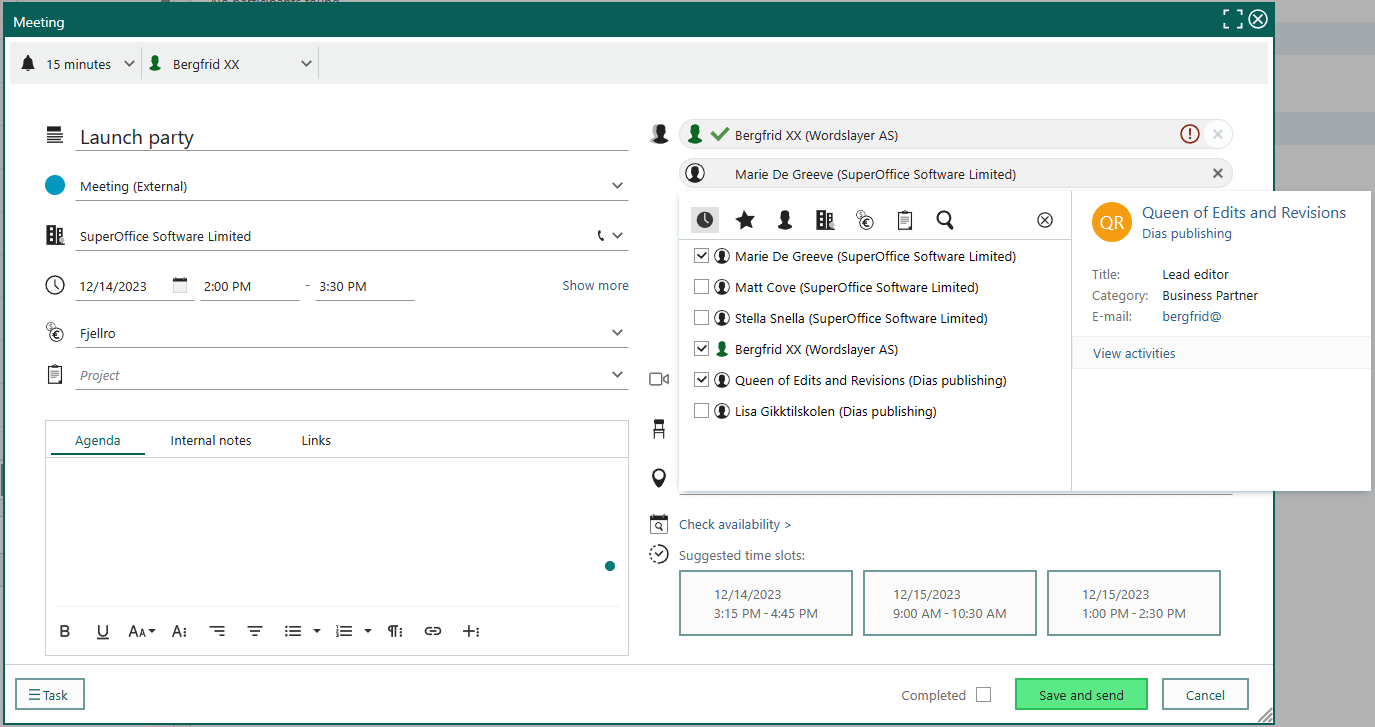
Click the Add attendees box. Then choose one or more persons from the list.
- Start typing to search for a person throughout SuperOffice.
- Select a person from the history list () or your favorites ().
- Click to search for an associate or to select persons linked to a company.
- You can also select sale stakeholders () and project members ().
Tip
To invite someone not registered in SuperOffice, enter their full email address
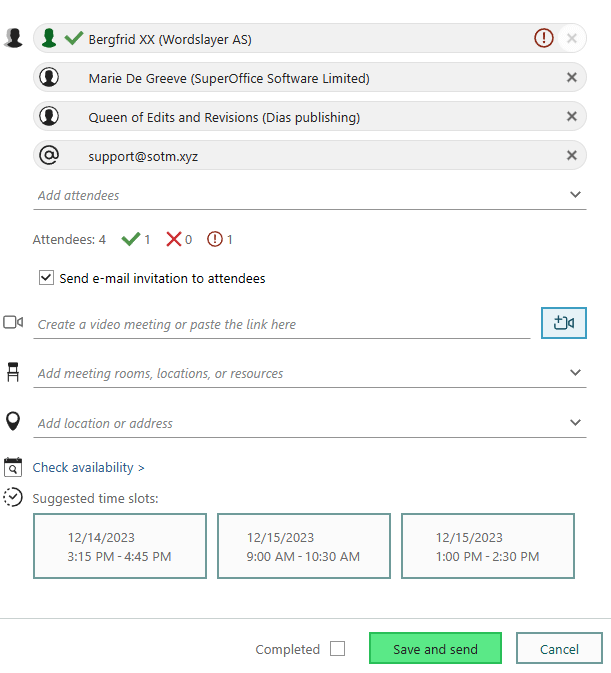
If an attendee is unavailable, an exclamation mark is shown next to their name. Choose one of the suggested time slots or click Check availability to find a better time.
Optionally, add locations, rooms, and/or resources.
Optionally, select Send email invitation to attendees. (This changes the Save button to Save and send.)
Click Save to save all changes.
Scheduling assistant
The scheduling assistant is part of the Follow-up dialog. The detailed calendar shows the availability of each internal attendant (associate). The top-most row shows the accumulated availability. The availability of external attendees and email attendees is unknown.
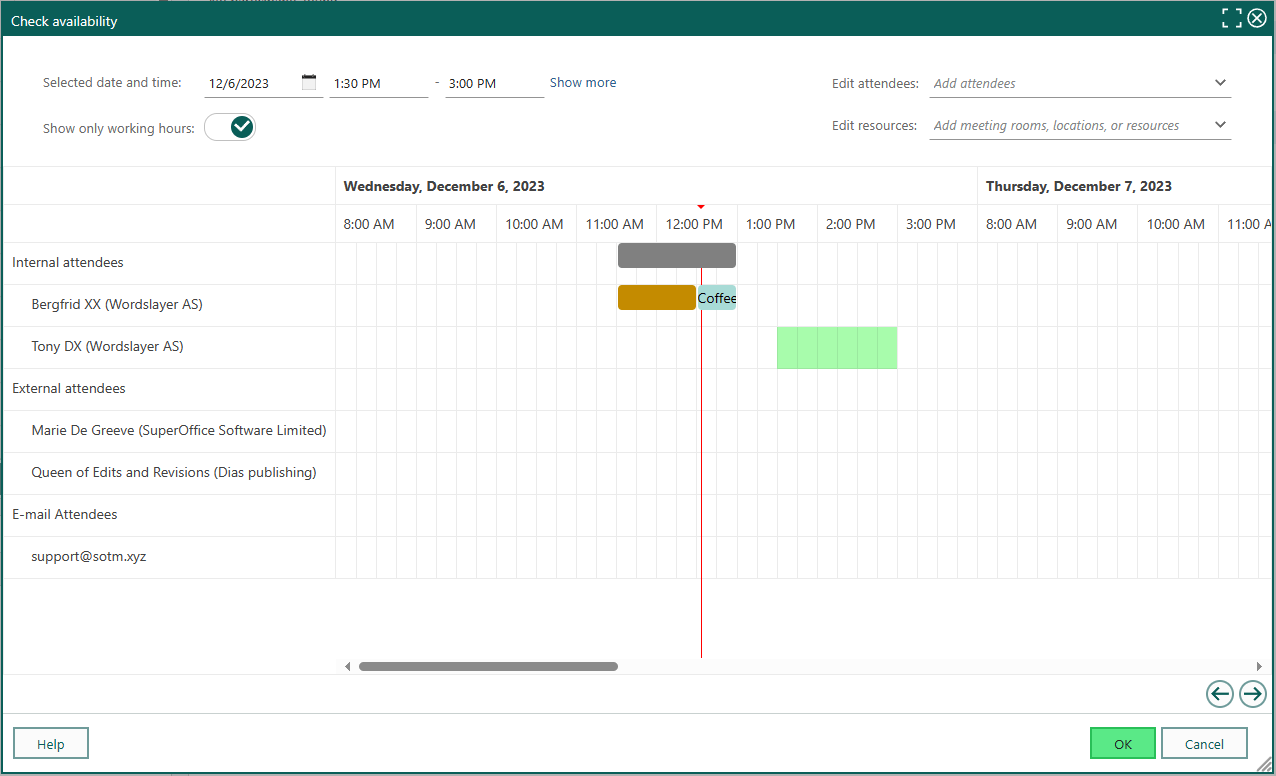
In the Follow-up dialog, click Check availability.
Click and drag the pointer left or right to select a meeting time. For example, from 1:30 to 3 PM, as shown in green in this screenshot. Use the scrollbar to move between days.
Alternatively, update the selected date and time at the top of the dialog.
Optionally, add or remove attendees and resources. Consider adjusting the time again if there is a conflict.
Click OK when you are done.
Click Save to save all changes.
Preview and update invitation email
When you click Save and send, a preview of the email is shown based on the title and agenda. Any internal notes added to the follow-up are excluded.
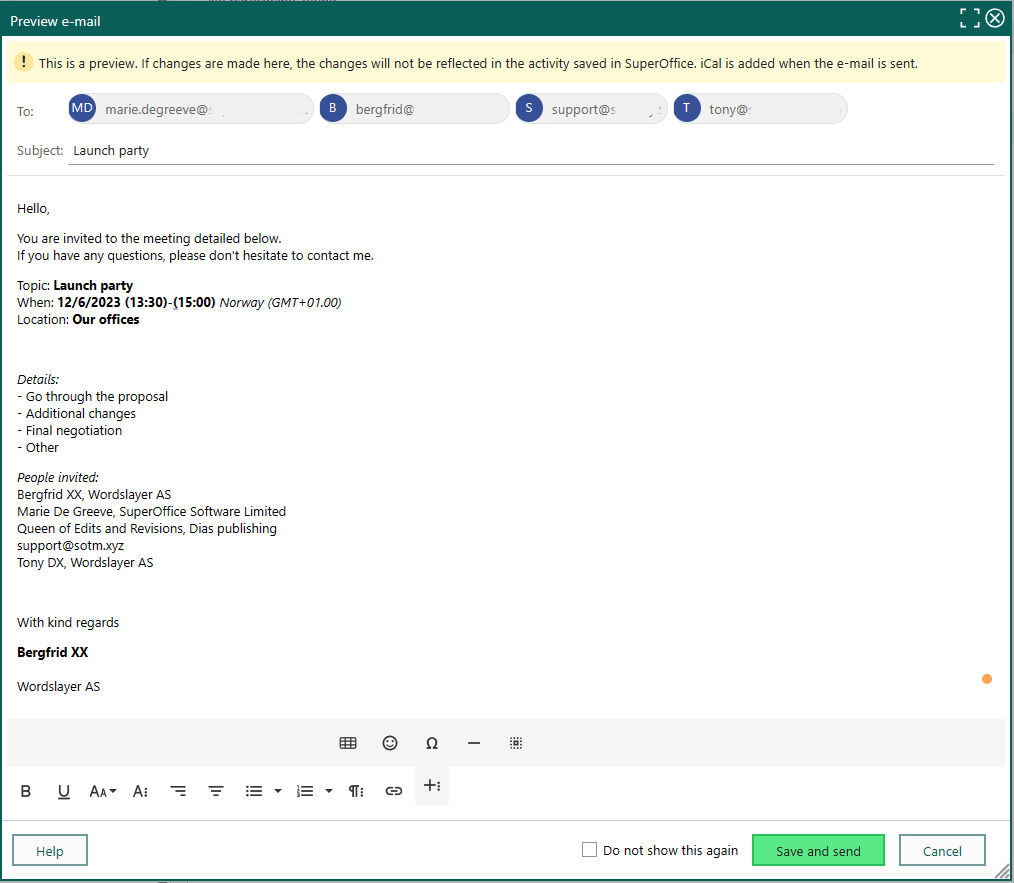
Update the subject and body of the email as needed. Use the rich-text toolbar in the footer to style your invitation.
Note
Any changes made in the preview are not saved back to the follow-up.
When you are ready, click Send.
What happens next
When you save the follow-up, the invitees receives a notification.
If a person declines the invitation, you get an Invitation declined notification. Click Got it to acknowledge.
Optionally, find a new suitable time and reschedule the follow-up.
How do I specify that an external contact has accepted or declined the invitation?
External attendees are notified via email (if you selected this option). Invitation emails sent to external contacts contain an iCal file (.ics) with the invitation data. When an external contact responds to your invitation, the status is automatically updated in SuperOffice.
To manually accept or decline an invitation on behalf of someone, select their name in the list and click the Toggle Status button one time to insert a green tick to show that the invitation was accepted, or click twice to insert a red cross for a declined invitation.
Troubleshooting
Why does nothing happen when I click Email Invitation?
If the contact you selected does not have a valid email address recorded in SuperOffice CRM, nothing will happen when you click Email Invitation.
Why is the Email Invitation button disabled?
Using the SuperOffice Inbox: If you have not entered the requisite information in the Log in screen, which is displayed the first time you click the Inbox button in SuperOffice CRM, the Email Invitation button is disabled.