Manage user groups
Audience:
Some tooltip text!
• 1 minute to read
• 1 minute to read
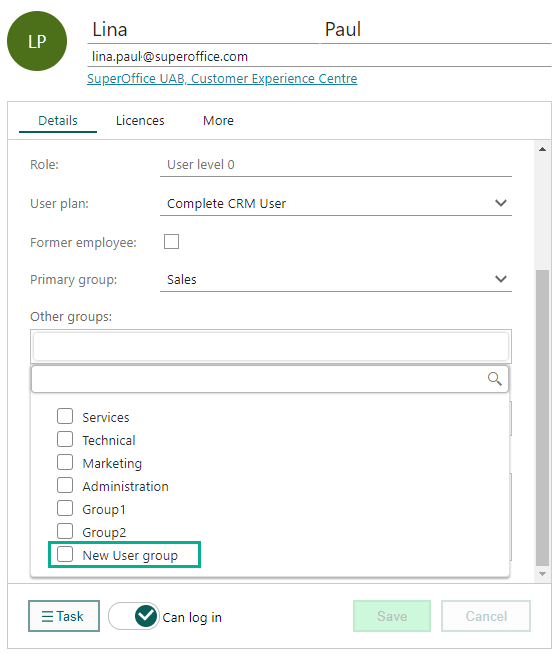
To group colleagues together and grant them access to CRM data based on this grouping, you need to create a new user group in SuperOffice and then assign this group to your colleagues.
Create user group
-
Go to Settings and maintenance.
Select Lists in the Navigator .
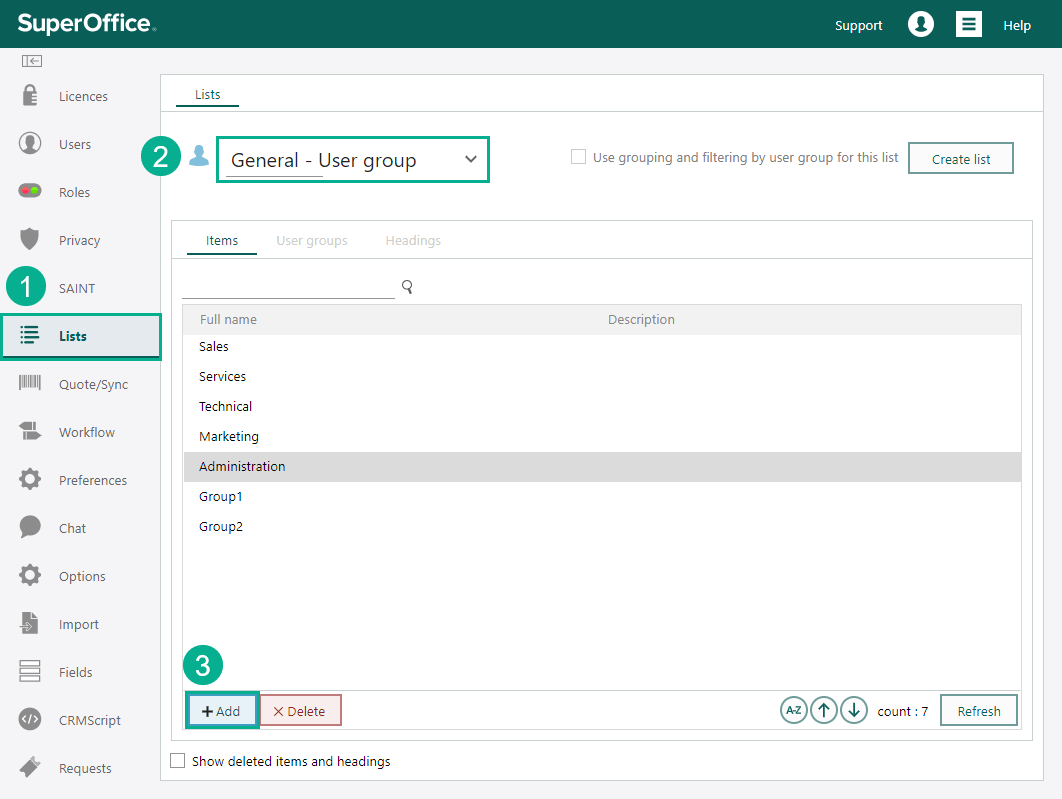
Choose General - User group from the list and click Add.
Enter information in the dialog. Optionally, choose one or more request categories for this group.
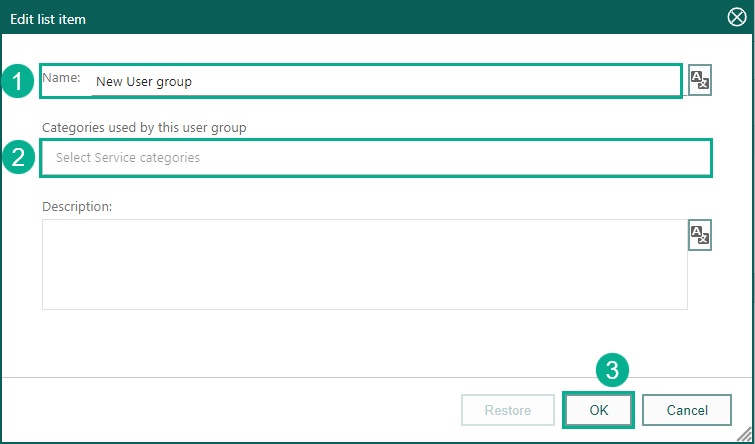
Click OK to save. Now the new user group is available in the User dialog.
Delete user group
- Go to the General - User group list as described above.
- Click the name of the user group in question.
- Click the Delete button at the bottom of the screen.