Add users
After your SuperOffice CRM solution is configured and customized, it is time to give your users access. This guide describes how to add one user at a time.
Administrators are responsible for assigning each new user a username, password, and primary group. In SuperOffice CRM Online, this also includes selecting a user plan. In SuperOffice CRM Suite subscriptions, the company's plan applies to all users — enable the Can log in option to grant access.
Note
If you provided user information when you ordered SuperOffice CRM, those users may already be in the system with login information sent to them by email. Check the Users screen before adding someone manually.
Steps
Open the Users screen.
Select the Associates tab.
Click the Add button below the list.
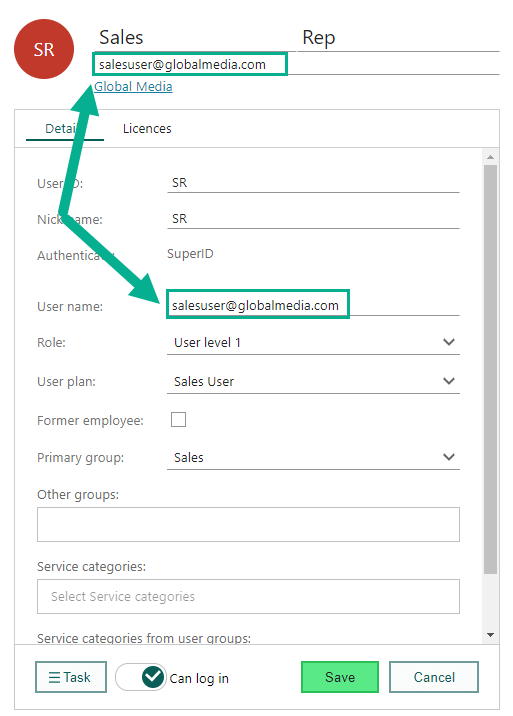
Enter the name and email address of the new user in the top-part of the card.
If more than one owner company is available in your SuperOffice tenant, you can select the owner below the Email field.
Enter the relevant information in the Details and Licences tabs.
Click Save. The name of the new user will now be displayed in the list.
- SuperOffice CRM Online: If active users need a different user plan, you can assign user plans in Settings and maintenance.
- SuperOffice CRM Suite: Manage user access by enabling or disabling the Can log in option. The company's plan determines which features all users can access. See CRM Suite plans.
Key fields explained
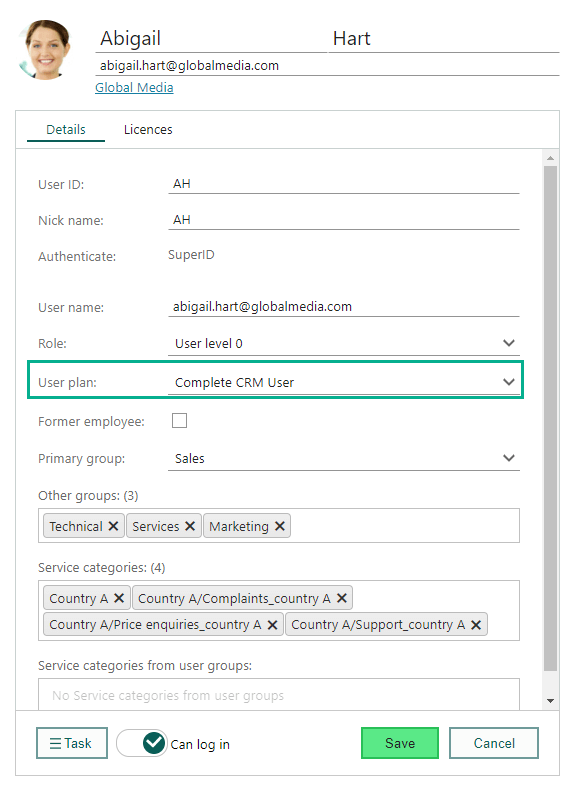
In the Details tab, you have the following options:
User ID: In the User ID field, edit the suggested ID for the user (if you do not want to use the automatically generated ID). You cannot specify a user ID that already exists in the database. There are no restrictions on the characters that can be used in the user ID.
Note
The user ID should not contain too many characters, because it is displayed in the ID columns in SuperOffice CRM, and space in these columns may be limited.
Nick name: The nick name is the name visible to other users of SuperOffice, and is used for SuperOffice Service users only. You can edit the suggested nick name for the user (if you do not want to use the automatically generated name).
Authentication: If multiple authentication methods are available, you can select an authentication method here.
User name: Enter the SuperOffice user name. This should be the same name as in your identity provider's system (if you use Office 365 or Gmail for authentication). When you use SuperOffice for authentication, simply fill in your email address. Make sure the email address is valid, because it is used for account confirmation.
Role: Specify the role the user should have in the Role list box. The role determines the user's data access and functional rights. You cannot change your own role.
User plan: Select the relevant user plan for the user. This determines which SuperOffice features the user can access. (SuperOffice CRM Online only. In SuperOffice CRM Suite subscriptions, the company's plan applies to all users.)
Former employee: If a user should no longer have access to SuperOffice, select this option to remove the user plan and login rights of the user.
Primary group: Select one of the predefined options for group membership in the Primary group list box. These options are defined in the Lists screen. The user is granted access to data owned by other users in the same primary group. Access rights (for example, write and delete access) for these data are defined in the role the user belongs to. See Visibility for more information on sharing data with your primary group.
Other groups: Click in the Other groups field and select which other groups the user should belong to. If the list contains many groups, start typing a group name in the search field to filter the list.
Service categories: These categories are used to give users access to specific request categories.
Service categories from user groups: Shows the categories the user gets from being in a user group.
Example
Joe Johnson works in the sales department of a large company. The primary group is set to "Sales" so that Joe has access rights to data created by users in the sales department. The access rights to the primary group are defined in the role Joe belongs to. This role determines if Joe can edit or delete data created by other users in the sales department (see Define data rights for a role).
Joe also needs limited rights to documents from the marketing department and development department. These two departments are added under Other groups. In the role Joe belongs to it is specified that Joe has read access only to these data.
Video: Add a new SuperOffice CRM user
Watch this demo to see how you can add a new user in SuperOffice CRM. (This video shows a previous version of SuperOffice, so the design may look different. The steps are the same.)
(video length - 1:46)
Troubleshooting
A newly created user cannot log in to SuperOffice
There are two common situations when a new user cannot log in:
- The username is not an email address or the email address is not valid
- The new user's account is not activated
-
Select Users in the Navigator.
In the list of users, select the user who cannot log in.
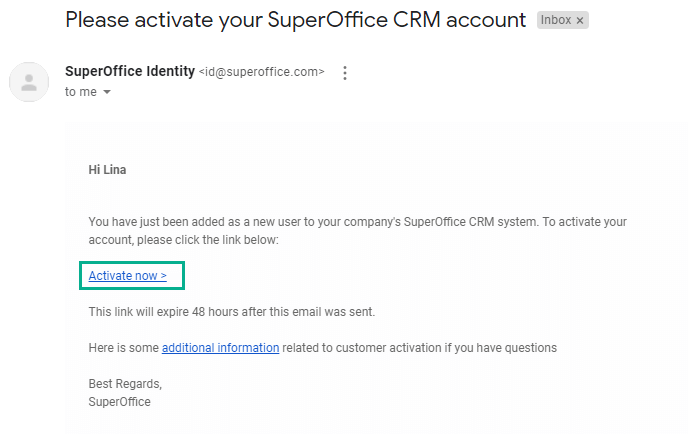
Make sure that the user has a valid email address filled in because this email address will receive an activation email.
Make sure that the user has received the activation email, and that the activation link has been clicked within 48 hours.
To resend the welcome email, go to Settings and maintenance > Users, select your user, click on the Task button and choose Send welcome email.
Make sure that the user has followed the instructions on how to log in to SuperOffice CRM.