Print labels
Label printing can be useful when you need to send letters to multiple recipients and want to quickly produce address labels to apply to all the envelopes.
Note
Starting from version 10.3.10, label printing uses the browser's print functionality instead of the PDF print option.
Steps
-
Go to the required selection and select the tab containing the records you want to work with.
Go to the Company/contact tab.
Click the Task button () and select Print labels.
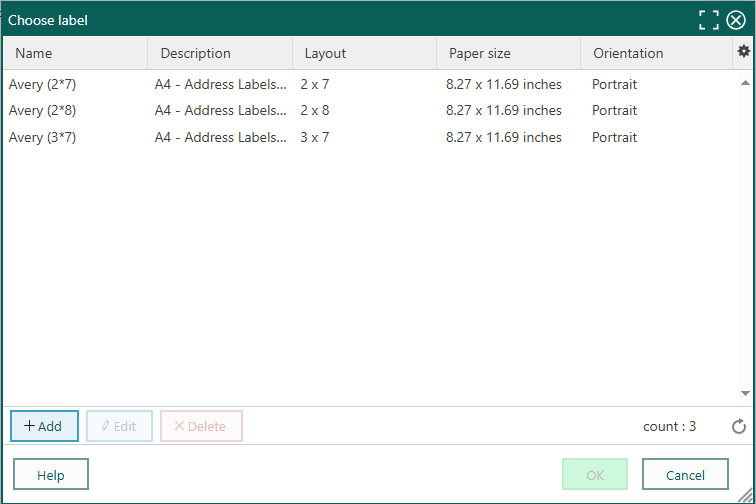
Choose your preferred label layout. All layouts are configurable and accessible to all users in the company, allowing you to fine-tune them as needed.
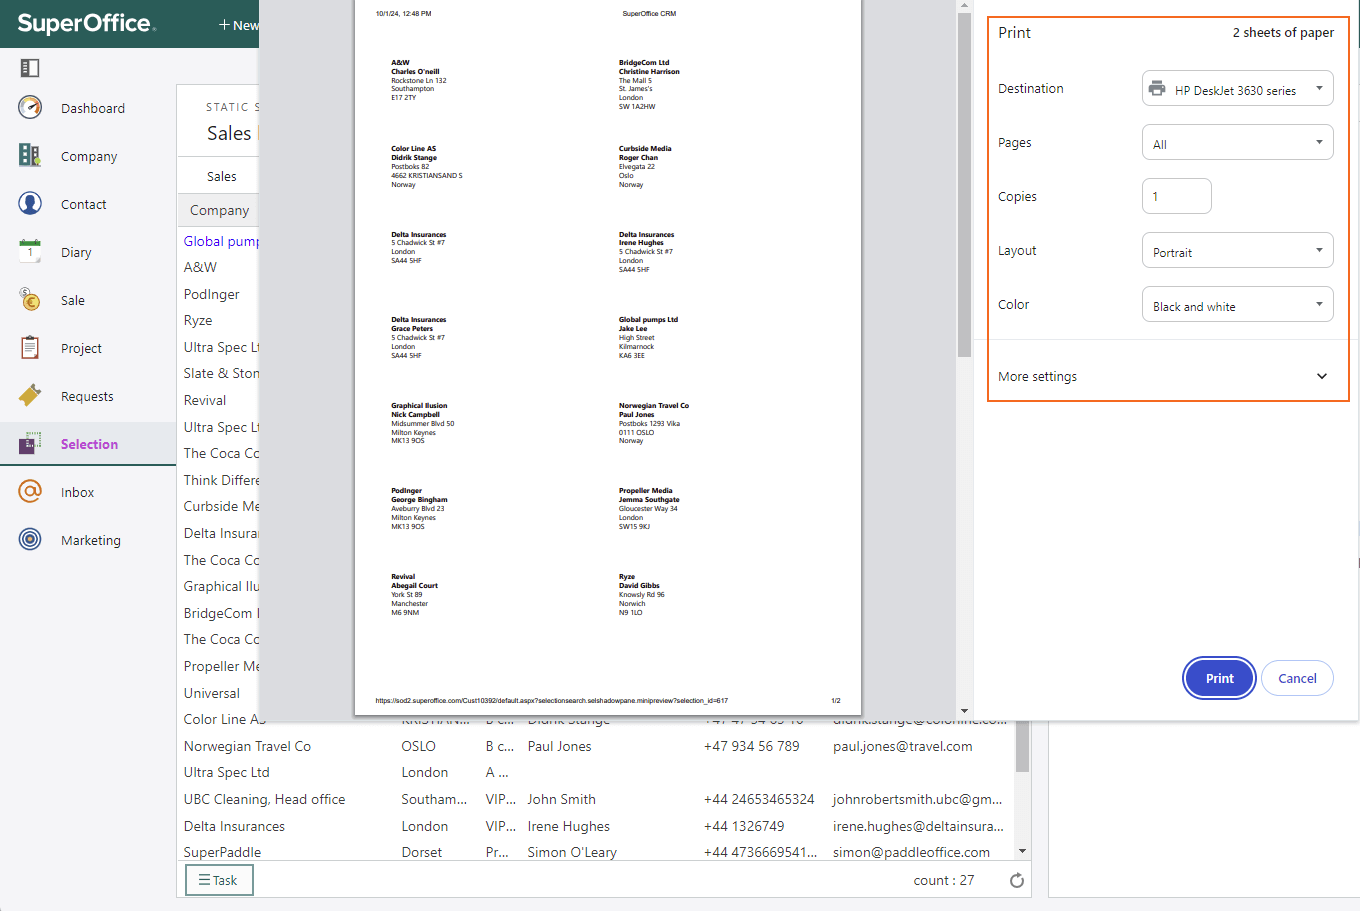
Review the required settings and click OK. For example:
- Scale: Actual size, default or 100%
- Margins: None
- Orientation: Portrait
- Paper size: A4
Adjust your browser's print settings (such as scale, margins, orientation, and paper size) to ensure the addresses fit correctly within the label area without overlapping.
Tip
If you use the browser print for other items, you may need to realign the label settings each time to ensure proper alignment.
Click Print.