Set up ERP connection for quote connector
To enable quoting in SuperOffice CRM, you must create an ERP connection using an available quote connector. The ERP connection determines where product data and pricing logic come from—either from an external ERP system or from SuperOffice's built-in product register.
1. Get the quote connector app
Before you can use a quote connector, you must install the correct app for your ERP system.
Go to the SuperOffice App Store.
Search for a quote connector that supports your ERP system.
Follow the provider's instructions to install the app.
To complete the setup, contact the app provider if required.
2. Add an ERP connection
Once the connector is available, you must configure an ERP connection to activate it.
In Settings and maintenance, select Quote/Sync in the navigator.
Go to the ERP connections tab.
Click Add. The Define new ERP connection dialog opens.
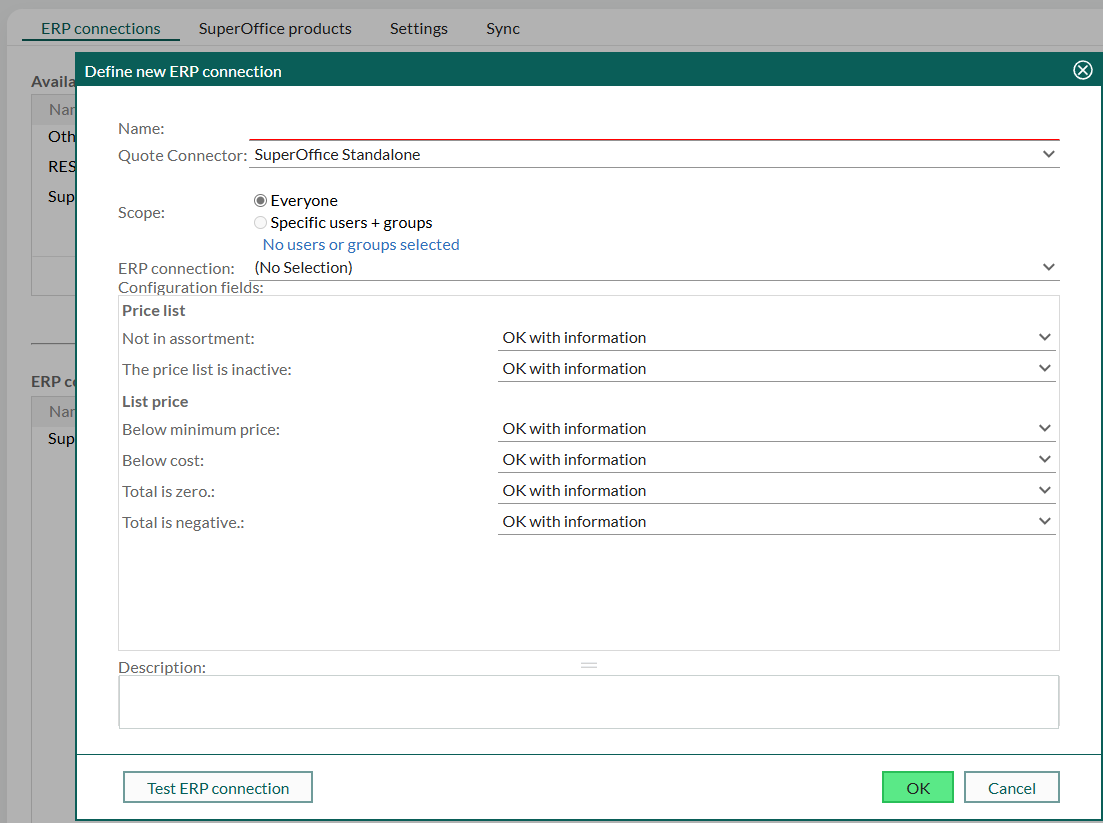
Fill in the required fields:
- Name: Internal name for this connection
- Quote Connector: Select the connector to use
- Scope: Choose who can use this connection (and its price list):
- All: Available to all users
- Specific users and groups: Click to select access
- ERP connection: (If applicable) select an ERP connection from the sync connector for this system
- Configuration fields: These vary by connector and may include:
- Authentication credentials
- Server or endpoint info
- Business rules like rounding, discount validation, or fallback logic
Optionally, enter a description to clarify the connection's purpose.
Click Test ERP connection to verify that it works.
Note
The test must succeed before you can save.
Click OK to save the ERP connection.
The new connection now appears in the list and is ready for use in quoting.
Delete or restore ERP connections
To delete an ERP connection:
- Select it in the list and click Delete.
To restore a deleted connection:
- Check Deleted to show removed connections.
- Select the one you want to restore.
- Click Restore.