Installing EMET
Enhanced Mitigation Experience Toolkit (EMET) can be downloaded from technet.microsoft.com.
The installation is straightforward, continue through the install wizard to complete the installation. Once EMET is installed it can be accessed from the lower-right corner. Double-click the icon to open the graphical user interface.
![]()
The following changes should be made to the settings:
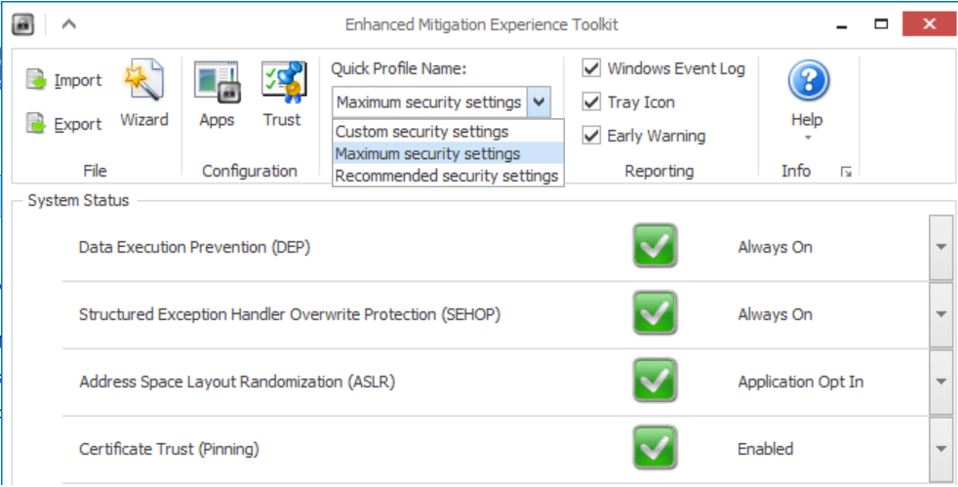
- Set the Quick Profile Name setting to Maximum Security Settings.
- Check that the System Status box shows the same settings as the screenshot below.
Next, we want to use EMET to protect some more applications than those that are protected by default. Depending on which sort of server this is, different settings should be applied. There are setting files available on the website that will protect SuperOffice executables. There are 2 different files at the moment:
This is because Customer Service is packaged into executables and all of these need to be configured to be protected by EMET, the first file addresses this. The second file can be used on web servers in general including the NetServer. It configures EMET to protect IIS in addition to all the default EMET protection rules.
To import the EMET configuration file, simply select Import from the menu and choose the XML file configuration file. If there are any errors, it is most likely because EMET did not find the SuperOffice installation at the path that was set in the XML file. To fix this, edit the XML configuration file and make sure that the paths match the installation path of your SuperOffice installation.

After setting up the rules, the applications must be restarted for the protection mechanisms to take effect. It is recommended to do a reboot of the server to make sure the rules are properly applied. After rebooting, the EMET GUI should show which processes are running EMET in the Running Processes list.

Repeat this process for the servers that are involved in the SuperOffice installation, for example, file server, database server, NetServer, and proxy server.