Migration guide
Have you checked the requirements and best practices? We strongly advice you to do so.
Step 0 - Start the wizard
- Go to Settings and maintenance > Preferences > Document library.
- Click Move documents from a previously used library, or open migration overview.
Warning
The SuperOffice administrator needs to complete the migration wizard before any changes are done to the documents. This is crucial!
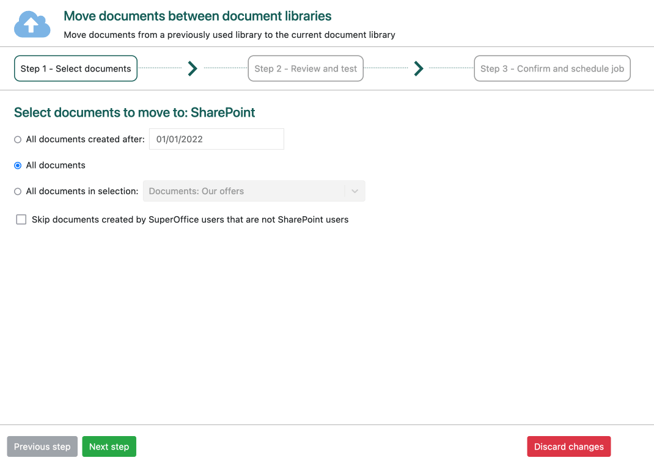
Step 1 - Select documents
In the first step of the wizard, you select which documents from your old library you want to migrate.

Choose one of the following options:
- All documents
- All documents created after
- January 1st the previous year by default. Adjust as needed.
- All documents in selection
- Choose a selection.
Note
A document selection can be used as the source of which documents to migrate in a specific migration-job. It can also be used to ensure you don't exceed the limitation of 20 000 documents.
Optionally, mark the checkbox to skip documents owned by former employees.
Click Next step.
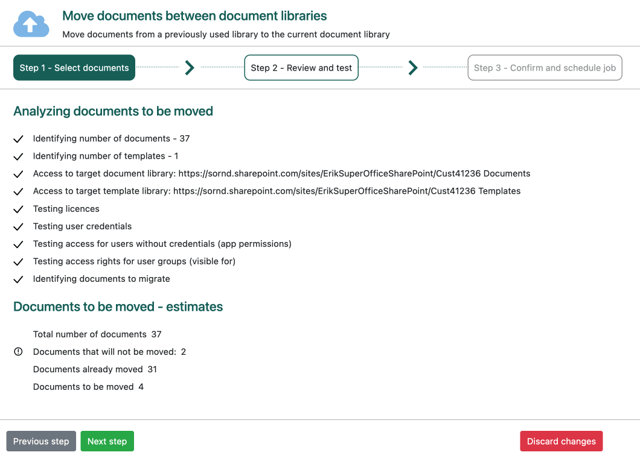
Step 2 - review and test
Based on what was selected in step 1, the wizard will run tests to make sure the migration tool will be able to move documents.

Click Next step to proceed. The button doesn't turn green and clickable until all tests pass.
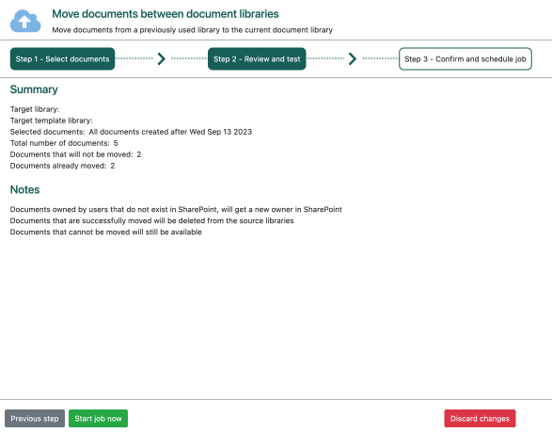
Step 3 - Confirm and schedule job

Review the summary of the job.
Read and pay attention to the notes.
When you are sure, click Start job now.
The migration job begins. The wizard returns you to the overview page where you can track the progress. You can't start a new migration while the current job runs.
