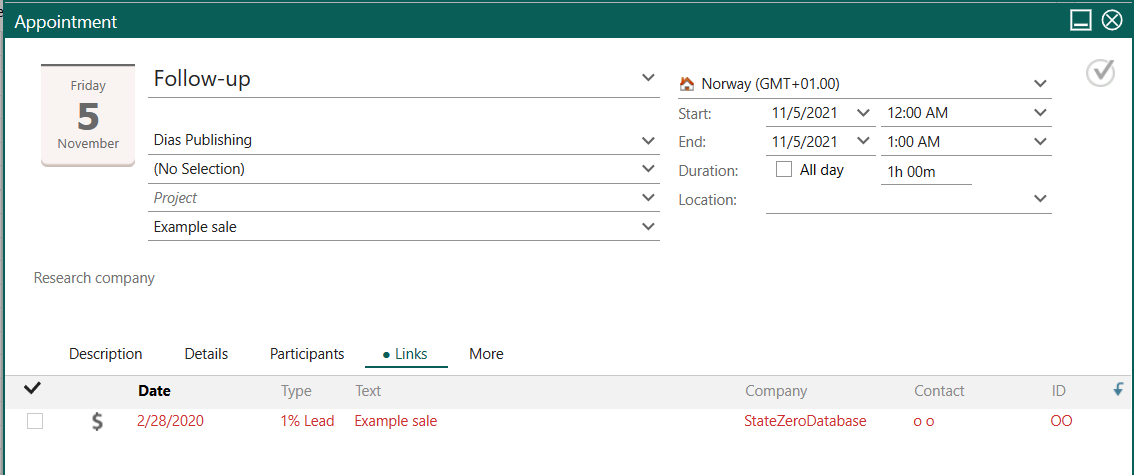
How to link a sale to a follow-up (services)
This section shows how we can add a link using the NetServer Services layer. The link to a related sale appears in the Links tab of the Follow-up dialog.

Code
In this example, we use the AppointmentAgent to retrieve an AppointmentEntity. Then we relate the follow-up to a sale using its Links property.
using SuperOffice;
using SuperOffice.CRM.Services;

Console.Write("Please Enter the UserName :- ");
string userName = Console.ReadLine();
Console.Write("Please enter the password :- ");
string passWord = Console.ReadLine();
Console.WriteLine();

using (SoSession newSession = SoSession.Authenticate(userName, passWord))
{
  //Gets the Appointment Agent
  AppointmentAgent newAppAgt = new AppointmentAgent();

  //Retrieves and Appointment Entity using the Agent
  AppointmentEntity newAppEnt = newAppAgt.GetAppointmentEntity(162);

  Link[] newArr = new Link[newAppEnt.Links.Length + 1];
  newAppEnt.Links.CopyTo(newArr, 0);

  Link newLink = new Link();
  newLink.Description = "Appointment Sale Link";
  newLink.EntityName = "sale";
  newLink.Id = 68; // The Sale ID to which the link refers to
  newArr[newArr.Length - 1] = newLink;

  newAppEnt.Links = newArr;

  newAppAgt.SaveAppointmentEntity(newAppEnt);
}
Walk-through
There is no tool available through the services layer to just add a link to the Links property. Therefore, we need to create an array of type Link and copy the data that is held in the appointment’s Links property using the CopyTo command. Then we create a new Link type, assign values to its properties, and assign the link to the last element of our created Link array.
Note
By creating the new array Links.Length + 1, we avoid accidentally modifying any existing data items stored.
By calling the agent's SaveAppointmentEntity method, we save the follow-up and the established link.