How to add a list item
There are several lists used in SuperOffice CRM. Most of them are stored in tables in the database.
An explanation of all lists is beyond the scope of this section so we will take the category list as an example. All manipulation of lists can be done the same way, so the knowledge that you gain here can be applied to all lists.
Note
When using the NetServer Services DLLs, it is not possible to add or remove list items through the web services. Therefore, you will have to create your own code to add items to the list.
Example 1
using SuperOffice;
using SuperOffice.CRM.Rows;
using(SoSession mySession = SoSession.Authenticate("SAL0", ""))
{
  //create a category row
  CategoryRow myCategory = CategoryRow.CreateNew();
  myCategory.SetDefaults();

  //give it a name
  myCategory.Name = "This is a category test";

  //set the rank
  myCategory.Rank = 5;

  //give a tool tip
  myCategory.Tooltip = "This is test tooltip";

  //save the row
  myCategory.Save();

  //create a category group link row
  CategoryGroupLinkRow myGroupLinkRow = CategoryGroupLinkRow.CreateNew();

  //set the group ID that you want
  myGroupLinkRow.GroupId = 2;

  //set the category ID
  myGroupLinkRow.CategoryId = myCategory.CategoryId;

  //save the category row
  myGroupLinkRow.Save();
}
In the above example, we have used purely rows to get the job done.
We have created a CategoryRow, filled some basic properties of the row, and saved it. This means that we have a new category and we can now use this category.
We have not stopped at creating a category, but we have created a CategoryGroupLinkRow as well. This is necessary to specify that this category belongs to this group. Creating a category group link row makes the category appear for the given group in the GUI.
Example 2
using SuperOffice;
using SuperOffice.CRM.Services;
using SuperOffice.CRM.Rows;

using(SoSession newSession = SoSession.Authenticate("sam", "sam"))
{
  //Creating a Category Row
  CategoryRow newCategoryRw = CategoryRow.CreateNew();

  //Assigning default values to the created Category Row
  newCategoryRw.SetDefaults();

  //Assigning values to the Properties of the Country Row
  newCategoryRw.Name = "Cat-Dush";
  newCategoryRw.Rank = 11;

  //Saving the Category Row
  newCategoryRw.Save();

  //Adding GroupLInk Table Values
  CategoryGroupLinkRow newCategoryGrLiRw1 = CategoryGroupLinkRow.CreateNew();
  newCategoryGrLiRw1.SetDefaults();
  newCategoryGrLiRw1.CategoryId = newCategoryRw.CategoryId;
  newCategoryGrLiRw1.GroupId = 3;
  newCategoryGrLiRw1.Save();

  CategoryGroupLinkRow newCategoryGrLiRw2 = CategoryGroupLinkRow.CreateNew();
  newCategoryGrLiRw2.SetDefaults();
  newCategoryGrLiRw2.CategoryId = newCategoryRw.CategoryId;
  newCategoryGrLiRw2.GroupId = 2;
  newCategoryGrLiRw2.Save();

  //Adding HeadingLInk Table Values
  CategoryHeadingLinkRow newCategoryHeLiRw1 = CategoryHeadingLinkRow.CreateNew();
  newCategoryHeLiRw1.SetDefaults();
  newCategoryHeLiRw1.CategoryId = newCategoryRw.CategoryId;
  newCategoryHeLiRw1.HeadingId = 6;
  newCategoryHeLiRw1.Save();
}
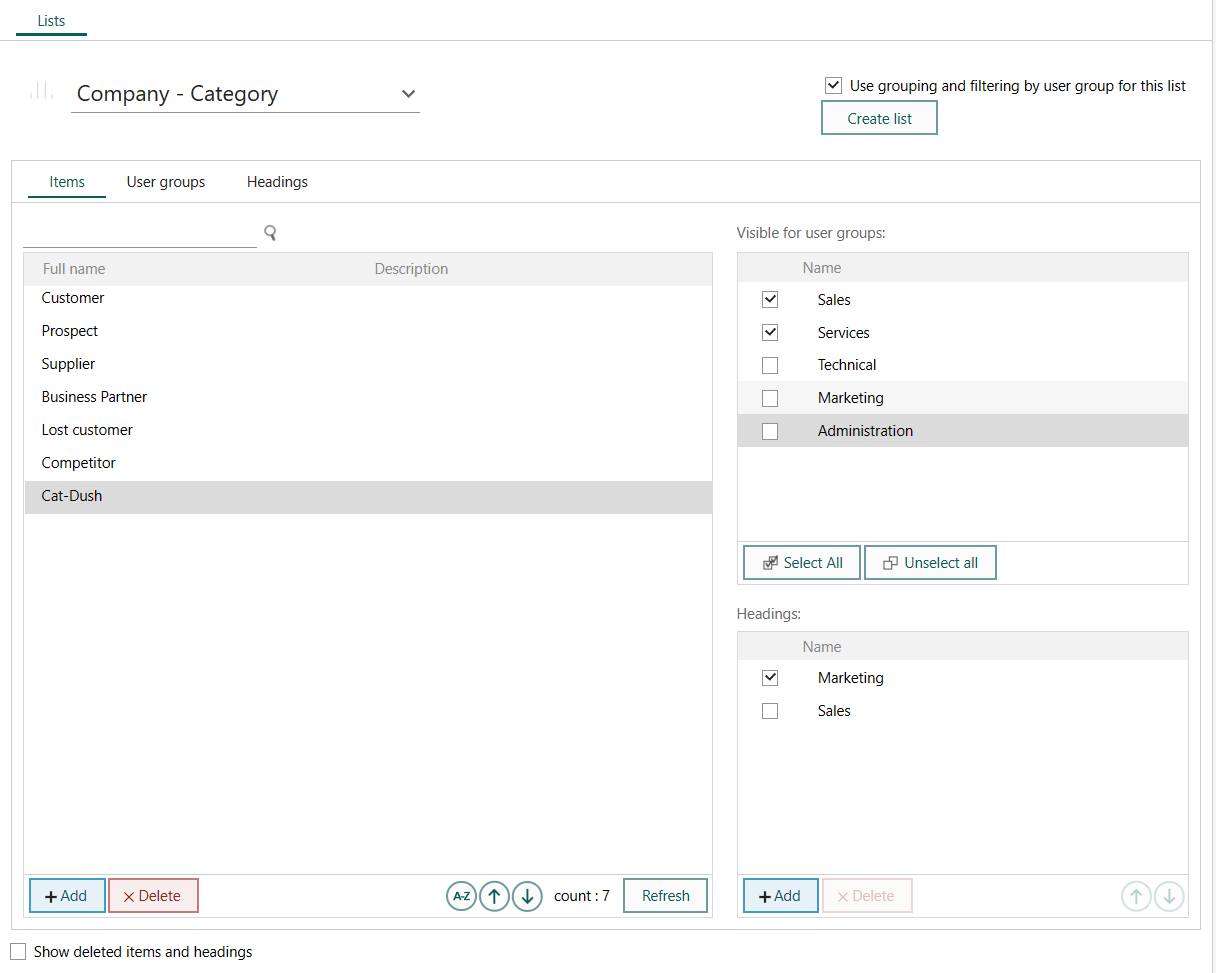
In the above code, we have created a new category called Cat-Dush which is stored in the Category table in the database. Then we have created 2 entries into the CategoryGroupLink table by creating and saving instances of the CategoryGroupLinkRow. This tells us to which user groups the category is visible for.
Next, we have added an entry to the CategoryHeadingLink table that determines under which heading the created category should be displayed. The created category can be seen in the SuperOffice CRM Admin as shown below.