How to link a sale to a follow-up (data layer)
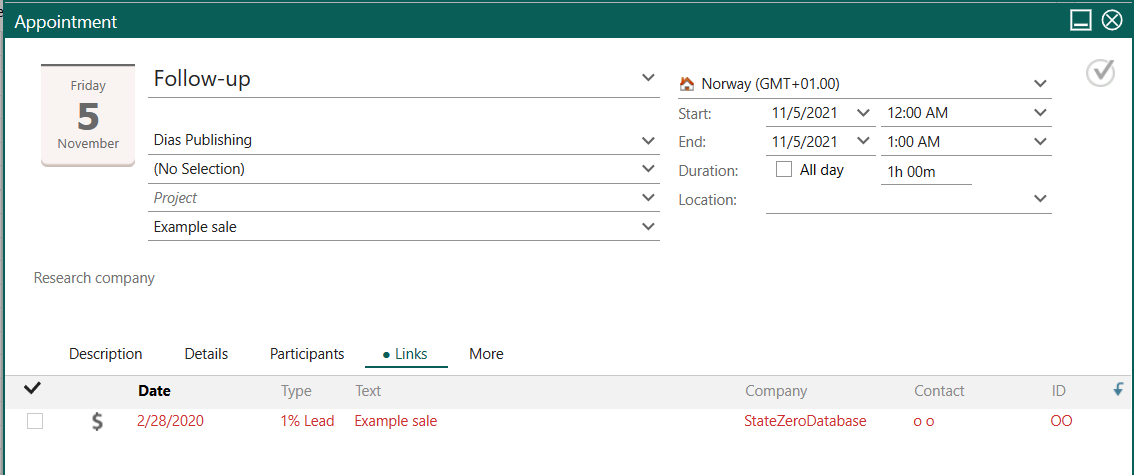
This section shows how we can add a link using the ActivityLinksHelper class. The link to a related sale appears in the Links tab of the Follow-up dialog:
Code
using SuperOffice;
using SuperOffice.CRM.Rows;
using SuperOffice.CRM.Entities;
Console.Write("Please Enter the UserName :- ");
string userName = Console.ReadLine();
Console.Write("Please enter the password :- ");
string passWord = Console.ReadLine();
Console.WriteLine();
using (SoSession newSession = SoSession.Authenticate(userName, passWord))1
{
  //Create a Sale and Save it
  Sale newSale = Sale.CreateNew();
  newSale.SetDefaults();
  newSale.Amount = 20000.00;
  newSale.Contact = Contact.GetFromIdxContactId(124);
  newSale.SaleText = TextRow.GetFromIdxTextId(169);
  newSale.Save();
  Console.WriteLine("A new Sale has been Created");

  //Creates an Appointment and link it a Sale
  Appointment newApp = Appointment.CreateNew();
  newApp.SetDefaults();
  newApp.Contact = Contact.GetFromIdxContactId(124);
  newApp.AppointmentText = TextRow.GetFromIdxTextId(169);

  //Adds the Link to the Sale
  SaleRow newSaleRw = SaleRow.GetFromIdxSaleId(newSale.SaleId);
  newApp.LinksHelper.AddSaleLink(newSaleRw);
  newApp.Save();
  Console.WriteLine("A new Appointment has been created");
  Console.ReadLine();
}
Walk-through
First, we create a new Sale and assign certain values to its properties. The SetDefault method is used to assign default values to the properties in that respective class. The Save method is used in the end to save the created Sale.
Next, we use the CreateNew method available in the Appointment class to create a new follow-up and then assign values to its properties.
At this stage, we are ready to link the sale and follow-up together. We retrieve our created sale as a SaleRow type by passing the ID of our created sale into the GetFromIDxSaleId method available in the SaleRow class. Then by using the following statement we can assign Sale relation to our Appointment.
newApp.LinksHelper.AddSaleLink(newSaleRw);